Stop the Generic Portfolio Trap! Design a Stand-Out Portfolio for Your UX/UI Niche: UI Design
|
90 min read
326shares
A sleek interface is not just about aesthetics—it’s the mark of a seamless user experience. As a UI (user interface) designer, your work influences how users interact with digital products. What’s more, your UI design influences how users feel when they interact with it. But how do you communicate your expertise effectively, especially when you consider how many polished portfolios are out there? Let’s explore the strategies to capture your craft and command the attention of hiring managers and clients.
This video discusses the core principles of effective UI design—grids, typography, and visual hierarchy—all of which are crucial in UI design and for crafting your portfolio.
ShowHide
video transcript
00:00:00 --> 00:00:30
In general, what you really, really need to learn first, because everything else comes with practice is grid typography, hierarchy, readability and some basic esthetics. But you don't really need to be an artist and design is definitely not art. It's not art because you have a very limited, you know, kind of scope of what you can do and you can't be too creative because that's going to make it unusable.
00:00:30 --> 00:01:03
So a lot of those Dribbble shots are basically artworks and they're just not able to become a real product because they are done in a way to just kind of have like a flashy visual. So we need to understand that. But what I think is the most important thing is the grid and the layout. I often tell the junior designers what I think the UI design really is, because this whole design thing is really, really like created to feel difficult to people. Like, you know, we have those super genius UX designers talking about lengthy processes
00:01:03 --> 00:01:30
and as a junior, we get discouraged. We get like, Oh, I'm not going to learn that ever because I'm not a super genius like they are. But in reality, a lot of the design is basically moving rectangles around. So you take a rectangle and based on some research and some knowledge, you move it to a different position, change the color, change the size, and that's it. And it's all rectangles, even if you're moving ovals because the bounding boxes are rectangular as well.
00:01:30 --> 00:02:03
So if you learn how and why and where to move those rectangles to, you're set to go. And after two years at university, I had a very hands on experience because I could actually walk to a desk and see what people struggled with. And these were the same problems over and over, mostly great problems, some color problems and typography problems. And do you think that this font is good and I'm going to break it to you know, it's not.
00:02:03 --> 00:02:31
So rule one off one because there is basically just one rule of good UI design. You don't want your brain to be working too much because our brains love order. They, they really, really hate chaos and they love order because it's easier for them to process. So if something is well-organized visually, it's just faster to process. So that brain is just working a little bit less. And if something is harder to process and it takes longer visually
00:02:31 --> 00:02:37
to process, then the brain is tired and it's kind of disliking the thing already.
Visual design is an important aspect of a UI design, but usability always trumps good looks. In this video, learn about the aesthetic-usability effect and why creating visually distinctive designs can set your portfolio—and your projects—apart.
ShowHide
video transcript
00:00:00 --> 00:00:31
There is something called esthetic usability effect, which means that if something looks good, it's not really perceived by people as being more usable, even if it's not. So those visuals are important and we really, really need to keep that in mind. A lot of the users have now become very tech savvy. A lot of the people, you know, using apps and using websites have been using them for 15 or 20 years now, and they are very skilled.
00:00:31 --> 00:01:02
So they understand the typical patterns. They know that checkout icons should be in the top right corner. They know how a good logging and registration works. So all things like that are kind of predetermined and there's pretty little innovation here. So you can do research to test the viability of the product. There isn't really much way to innovate and user interface. The visuals can be the differentiator. And of course we can use a design system like material design, but that would be
00:01:02 --> 00:01:21
a horrible world to live in because those apps would be all looking boring and soulless and people want that design. That's why people buy Apple products, among other things, because they look good and they are different than everything else, at least sometimes. So people buy with their eyes and we really need to remember that.
For a successful UI portfolio, you’ve got to show both—smooth user experiences that are aesthetically pleasing—but more than that, you’ve got to show how you came up with them. Clients, hiring managers—anyone who’s in need of your skills—want to see your design process, how you solve user problems, and ideally, the impact of your designs in the real world.
A strong portfolio must demonstrate problem-solving—a core part of UX/UI design. Visual appeal alone isn’t enough; your portfolio must prove that your designs are effective and user-focused. So, instead of simply showing polished screens, take your viewers on a journey through how you identified and solved specific design challenges.
There are two straightforward and effective ways to convey the impact of your designs:
Metrics and results: If you have quantitative results, include them. Metrics like “reduced bounce rates by 25%” or “increased conversion rates by 15%” emphasize the efficacy of your designs.
User feedback: Qualitative feedback is just as valuable. Highlight user comments that reflect how your design improvements made a difference.
To create effective case studies for your portfolio, structure each project like this:
The problem: Clearly define the design or user interface challenge. This could be anything from high bounce rates on a landing page to poor navigation in a mobile app.
Your role: Describe what role you played—did you lead the visual design, conduct user research, or collaborate with other teams? Be specific.
The solution: Showcase how you tackled the problem. Explain your design decisions in detail—did you simplify navigation, enhance the visual hierarchy, or improve button placement to increase engagement?
Outcome or results: Include metrics if possible—like a reduction in bounce rate, an increase in user engagement, or positive user feedback. This data proves that your work had a tangible impact.
This approach shows the hiring manager more than just what you designed; it tells a story about why you designed it and how it benefited users.
Case Study Example: Redesign of a Mobile Banking App
The problem: Users found it difficult to complete key actions—such as viewing account balances or transferring money—due to cluttered screens and inconsistent design elements. This led to a poor user experience and high drop-off rates during critical interactions.
My role: As the lead UI designer, I worked with UX researchers to understand the specific frustrations users faced. I collaborated with developers and product managers to refine the visual hierarchy, reduce cognitive load, and make essential actions more intuitive.
The solution: I redesigned the user interface to create a cleaner, more focused experience by decluttering the interface and implementing a clear visual hierarchy. I introduced consistent design patterns across all screens, improved button styles to draw attention to key actions, and ensured that primary tasks—like transferring funds—were visually distinct and easy to initiate. Furthermore, I optimized the use of colors and spacing to make important information—like account balances—stand out clearly without overwhelming users.
Outcome: The updated interface led to a 25% increase in task completion rates, with users reporting greater satisfaction due to the simplified and visually consistent layout. Positive feedback about the ease of accessing core features increased by 40%, and overall drop-off rates fell significantly.
From Sketch to Success: Illustrate the Evolution of Your Design Process
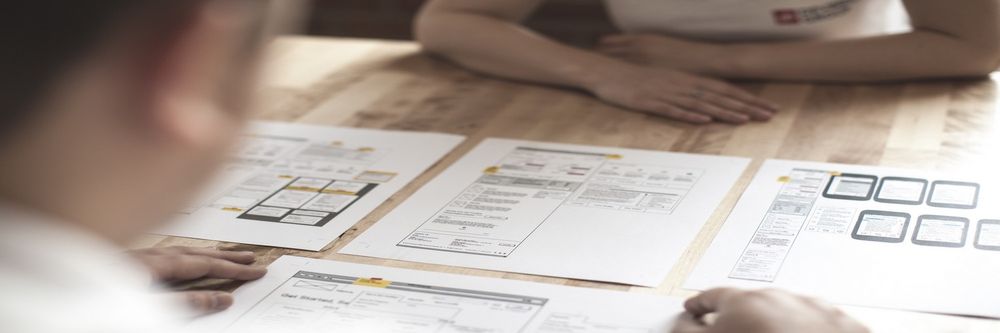
Your ability to think through problems and iterate on solutions is exactly what hiring managers are looking out for. Assets like wireframes, sketches, and prototypes demonstrate your process from the initial concept to final product.
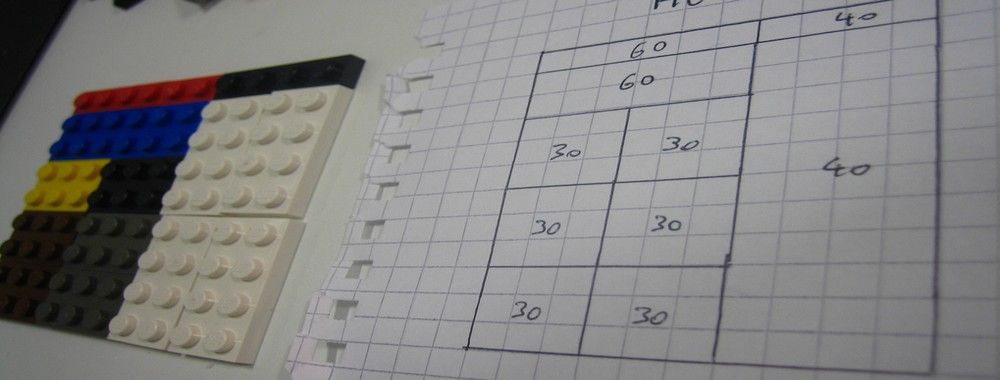
Sketches and wireframes: Include early wireframes and sketches in your portfolio to show the foundations of your design. Remember to annotate these designs as they explain the decisions you made at each stage.
In this video, Designer, Teacher, and Illustrator, Mike Rohde talks about how you can use five basic shapes to communicate your design ideas. When you use these shapes, you take the pressure off drawing something pretty or perfect, and rather focus on the thinking behind your designs.
ShowHide
video transcript
00:00:00 --> 00:00:30
So, the way we get into drawing simply is by using what I call the *five basic elements of drawing*. And I think these are really important, especially if you are coming to this course and you feel like "I can't draw"* – remember the asterisk – "as well as I would like." So, the important thing about this is this changes an approach
00:00:30 --> 00:01:00
to your drawing; it moves it away from art and to ideas. So, my mantra is "Ideas, not art." And I think this is a foundational part of what I believe in. Not that there's anything wrong with art; it's just that art has *baggage* with it. You can draw like a little suitcase here. Art has baggage. It has baggage from junior high school when someone drew better than you or you felt like your drawing skills were not as good as you wished they were.
00:01:00 --> 00:01:32
And that's very natural. So, we're here to help you through that. So, what are the five basic elements of drawing? Well, the first one is a *square*; second, *triangle*; third is a *circle*; fourth is a *line*; fifth is a *dot*. So, the square of course can be a rectangle or something like that. A triangle can be all kinds of shapes.
00:01:32 --> 00:02:00
A circle can of course be stretched into an oval. Lines don't have to be straight – they can be squiggly. And if we really wanted to talk about it, the dot is really the foundation of all these. These are all dots that are lined up in a certain order. But it's much easier to remember five elements. And there's also a reason why I chose five elements – it's because they're easy to remember when you're in the heat of the moment.
00:02:00 --> 00:02:30
So, let's flip the page here, and we'll go to drawing with these five basic elements so you can see how this mindset works. All right, so let's draw with the five basic elements: square, triangle, circle, line and dot – any order. I just happened to choose that order. Now what I'm going to do is show you what I mean
00:02:30 --> 00:03:01
by this simple way of drawing. So, let's start with a simple one. So, if you have your pen, write 'house' here. I'm using green to set it apart from the drawing. So, on a house you can get away with – if you want to call it that – a square and a triangle on top. Right, that would be enough to communicate the idea of a house. But you can go further, and you're still using these same elements.
00:03:01 --> 00:03:32
You use a rectangle, which is – you know – a stretched square. You can do a line here, and now you've got a window on your door of your house. A dot can be your doorknob. You can put another window up in the attic, let's say, and then a rectangle for a smoke stack or chimney. And then, finally, what about a curvy line? And that would be the smoke coming from the chimney. And now you've got a house. So, you can see it can be as simple as two objects or many objects based on the time you have. And the cool thing about it is
00:03:32 --> 00:04:01
you could start with a very simple one and after you do your sketchnote you can come back and fill those in. So, let's do another one; let's do 'book'. How would I communicate 'book' in the simplest form? So, one thing I'll say about this approach of five basic elements of drawing is it's a little bit of a game. So, you can see here I've done a rectangle and a line down the middle or two rectangles next to each other, I guess you could say. It's very, very simple, but it communicates the idea of a book,
00:04:01 --> 00:04:30
especially with the word below it. And this is really important. This idea that *words and pictures work together* in Sketchnoting is really critical. It's really important because you have the power of both and they support each other and they add to each other, which is a positive. So, you can see I could stop here. So, the game is: how *few elements* can I use to communicate an idea? It's a little bit like the game Pictionary – how few things can you use to draw to get your team to recognize? – a similar idea in some sense.
00:04:30 --> 00:05:02
But you can also, just like with the house, *add more detail*. So, let's add another line below and connect it. And what you may notice is, even though it's just a two-dimensional drawing, what I just did sort of suggests to your mind that you're actually seeing dimensionality. This can really be reinforced if you have, say, a gray marker and you run a gray marker here. It reinforces it; there's shade here; that there's depth, light's on the top, shade on the side. But all you've done is drawn a line and connect it.
00:05:02 --> 00:05:33
So, when you start thinking about that, really what you're doing is you're *providing enough information* for your brain to *interpret* this object as something. And that is a huge weight off your shoulders because now you don't have to be a great artist; you simply have to draw this object well enough that your brain can interpret it properly. So, let's add some more detail, so books have text on the pages. Now, this is quite small, so I wouldn't try to draw text, but we can do lines, and now this suggests that we've got text on the page.
00:05:33 --> 00:06:03
Some books also have images. So, let's draw an image – a square. I'll put a triangle in there – maybe it's a photo of a mountain – and then finish with two more lines. So, now it's getting the feeling that it's a book with text on the pages. There's a picture, and it's got some depth to it, which is kind of cool. Now, the third one I'm going to show you is coffee, one of my favorite drinks. So, you might start thinking if you're going to draw coffee, now you have to think about
00:06:03 --> 00:06:32
perspective and circles and "Oh, I'm not good at circles!". Here's another trick around this approach: stay *two-dimensional as long as possible*. This really reduces the stress on you. And if you can communicate an image in two dimensions, then do that. Don't feel compelled to draw in dimensionality or in proportions if you're not comfortable with that yet. That may be a later skill. So, stay two-dimensional as long as possible. And I'll show you what I mean by that.
00:06:32 --> 00:07:00
If you have a cup of coffee – let's say it's one of these cafeteria cups – why can't you just simply use rectangles and draw the side view? It still will represent as a cup of coffee. So, let's do a half circle here and one inside, so now we've got the handle on the coffee. And then, finally – just like with the house – let's put a little vapor coming off of it. And now you're implying that the coffee is hot. There's a little bit of vapor coming off of there.
00:07:00 --> 00:07:34
If you happen to be a tea drinker, well, all you need to do is write the word 'tea' below here, right? The beautiful thing about this is you're staying simple. It turns into a bit of a fun game to see how few elements can you use to represent the idea of something. It's representative. It's a simplified version. You're *not going for realism*. It *doesn't have to be beautiful*, but it *must communicate the idea* to other people or at least to you if the sketchnotes are for you. So, I think that's really important to think about as you're doing this drawing
00:07:34 --> 00:08:03
and you're seeing how it can impact the work that you do. What I want to talk about now is what happens when you start to practice drawing with these five basic elements. You're effectively building a visual library. What I mean by that is the more often that you draw objects repeatedly, you will then build a library of those objects in your mind.
00:08:03 --> 00:08:30
Now, you can of course have it on a piece of paper that you slide in the back of your notebook, just like this, if you wanted to make a collection that way. But as you draw these things over and over again, you start to build that library in your head. So, finishing the food theme next to my coffee or tea, let's talk about pizza, and specifically a slice of pizza. So, you might be tempted to simply draw a triangle. I would avoid that.
00:08:30 --> 00:09:03
And the reason why is, a slice of pizza really comes from a whole pizza – you should do a curve here, do a second curve in parallel, and now you've got crust. Now, remember the trick I taught you around the book. We can do the same thing here. You just draw another line below there, and now you've got depth to the pizza crust. Now, the other thing I'll show you is if you're going to draw, let's say, pepperonis, have them partially on the pizza. Maybe there's one here. I can fill them in with some shading;
00:09:03 --> 00:09:31
just some lines to give them some depth. And the reason that I say you use a curve is really like – you know – this slice of pizza is coming out of a circular pizza. So, you're reinforcing that it's a piece of a whole without even having to say those things. So, there's a really simple way to draw a slice of pizza. So, what's really interesting is you can actually build quite a few icons. So, let's do a little icon drawing, and then I'll label afterwards to show you
00:09:31 --> 00:10:02
how you can build a visual library that you can use over and over again. If you're someone like me – I'm a designer and I live in the world of deadlines – so, five o'clock on Friday is often a deadline for me. So, I can simply use this symbol in the sketchnotes that I do or the notes that I'm taking to represent a deadline that's upcoming. What about *ideas*? If I have an idea – let's say I'm taking notes about some other subject – I would draw like a little lightbulb like this,
00:10:02 --> 00:10:33
and that could represent an idea really quickly. If I have a challenge of concerns about a project – let's say I'm in a meeting taking notes – I'm very concerned about the timeline. Maybe I make the deadline on Friday, but the overall project is still behind. This would be what I would say 'alert'. And this can clue me into delays or problems of all kinds that might be happening, and I want to indicate that. So, very often for these, I'm actually using
00:10:33 --> 00:11:01
these in the notes that I'm taking; so, if I'm taking notes, more detailed notes, I'll sprinkle these in there. And what they do is help me identify when I scan through my notes, *actions*. So, what's the action here? Deadline on Friday; make sure it's on my calendar; make sure all my tasks are in order and that I'm working toward that Friday deadline. I have an idea. Maybe I need to sit down and write for an hour to express this idea so I don't lose it. But I would write enough that I could represent it later.
00:11:01 --> 00:11:33
So, the next task here would be to sit down for additional time and fill out the details of that idea in a sketch by writing whatever that is. This alert might suggest to me that I need to talk to my co-workers about issues that we see long term around this project that seems to be losing track – like it's falling behind; how can we address this? Is there something we can move back and accelerate this project to get it back on track? So, the last thing that I'll show you is a very useful tool for coming up with icons to build your visual library.
00:11:33 --> 00:12:01
And that is TheNounProject.com. This is a website where you can go, you can search any kind of term, and there will return not one but many different ways to interpret that idea as an icon. And this can be really helpful in building your visual library. If you're looking for certain objects that you use all the time in your work or in your personal life, this can be a really useful tool. I would say the second tool that's good for searching is just Google.com.
00:12:01 --> 00:12:34
And then focus on the image tab when you get the result that you're looking for, and then images will come up. And these can be helpful for just sparking your ideas around how you can simply communicate this concept. So, these are two really helpful ways to think about building icons and building your visual library. The last thing I'll say is if you're in a specific profession, it could be really valuable for you to take time *every day* and *every week* to sit down and make a list of all the words you would love to have icons for
00:12:34 --> 00:13:00
and then build those icons so that you've got those ready to go. And then have a reference that you carry with you. And as you get into meetings, you can have that reference out and you immediately have a symbol that represents those concepts that's always with you. And then, eventually as you do those more and more, you won't even need the card anymore; it'll be burned into your memory, and you can pull those out at a moment's notice on a whiteboard, on your notes, on whatever it is that you want to use.
00:13:00 --> 00:13:26
So, that is a really valuable way to think about drawing in a very simple way and to build your visual library – two really key parts to this whole Sketchnoting thing – because I believe if you can make it over the hump of not drawing as well as you'd like by focusing on ideas like this, then you'll be in a really good position to do the rest and feel confident and move forward and experiment and try things, which we're going to do.
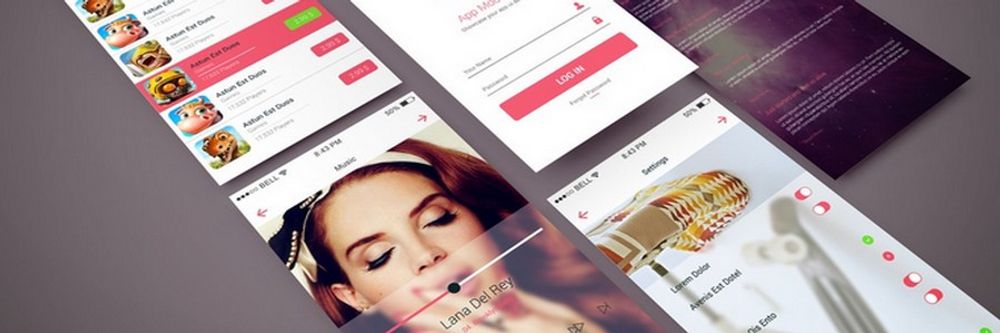
Interactive prototypes: Create clickable prototypes of your designs using tools like Figma. This allows viewers to understand the user flow and see your interface in action. These prototypes can then be embedded into your portfolio.
From a rough wireframe to a polished mockup, and finally an interactive prototype; this progression showcases your design thinking, problem-solving skills, and ability to bring ideas to life—key elements that stand out in a portfolio.
A Multifaceted Designer: Demonstrate Your Diverse Talents and Expertise
UI designers tackle many different projects; so, use this to your advantage and represent this versatility in your portfolio. Showing your range is particularly valuable for general UI roles—you can show that you’re adaptable and able to take on any UI challenge. That said, if a job you’re applying for has a specific focus—for example, ecommerce—adapt your portfolio to reflect your most relevant experience.
The Collaborative Advantage: Showcase Your Ability to Thrive in a Collaborative Environment
No design exists in a vacuum. Like all UX design, UI design is a collaborative effort, and recruiters want to know you can work well in a team. So, emphasize your role within a team and how you contributed to the overall project.
Design sprints and iteration: Showcase instances where you worked within a cross-functional team, iterated on designs based on stakeholder feedback, or participated in design sprints.
Cross-functional collaboration: Talk about how you collaborated with UX designers, developers, product managers, and other team members. This shows you understand how to work in a collaborative environment and bring together different perspectives to create cohesive solutions.
Effective collaboration across design, engineering, and other roles not only improves the final product but makes sure everyone gains a deeper understanding of user needs from the outset too. Learn more in this video.
ShowHide
video transcript
00:00:00 --> 00:00:30
Cross-functional teams, unlike silos, have all the people necessary to build a specific thing together. Let's look at an example. Imagine you're on a team that is supposed to build the onboarding flow for a new app that helps connect job applicants with jobs. You can't build the whole thing with just designers. Or with just engineers, for that matter. I mean, you probably could do it with just engineers, but it's a terrible idea.
00:00:30 --> 00:01:00
A cross-functional team for this onboarding work might include a few engineers, perhaps some for the front end and some for the back end. Might include a designer, a researcher, a product owner or manager, maybe a content writer or a marketing person. In an ideal world, all of these folks would only work on this particular team. In the real world, where we actually live, sometimes folks are on a couple of different teams and some specialists may be brought in to consult. For example, if the team needed help from the legal department to explain some of the ramifications of a specific decision,
00:01:00 --> 00:01:32
a cross-functional team would have a dedicated legal expert they could go to. But that legal expert might also work with lots of other teams. In agile environments, the cross-functional team generally sits together or if remote, has some sort of shared workspace. They all go to the required team meetings. They understand the goal of the team and the users. They're experts, or they soon become experts, on that onboarding flow. Contrast this to how it might be done in a siloed environment. In that case, you might have different people assigned to the team depending on need, which can seem really flexible.
00:01:32 --> 00:02:00
Until you realize that you end up with five different designers working on the project all at different times and they all have to be brought up to speed and they don't really understand why the other designers made the decisions that they did. Same with the engineers. And do not get me started on legal. Silo teams tend to rely more on documentation that gets handed between groups. And this can lead to a waterfall project where project managers or product managers work on something for a while to create requirements, which they then hand off to designers who work on designs for a while
00:02:00 --> 00:02:29
and then they pass the deliverables on to engineering, who immediately insists that none of this will work and demands to know why they weren't brought in earlier for consultation. You get it. By working in cross-functional teams instead, the people embedded on the project get comfortable with each other. They know how the team works and can make improvements to it. They come to deeply understand their particular users and their metrics. They actually bring engineering and even design and research into the decision making process early to avoid the scenario I described above.
What’s more, a few well-placed quotes from teammates, clients, or stakeholders about your ability to work effectively in a team will add credibility and show potential employers that you’re not only talented but also a reliable and valued collaborator.
Case Study Example: Collaborative SaaS Dashboard Design
The problem: The SaaS dashboard was overly complex, leading to user confusion and inefficiencies when navigating key features.
My role: As the UI designer, I collaborated closely with developers to ensure that the design solutions were technically feasible and responsive across devices. I also engaged with stakeholders, including the marketing and customer support team, during iterative design sprints, gathering feedback to refine the interface continuously.
The solution: Together with the development team, I simplified the dashboard layout to improve usability and prioritized key features to be more accessible. Throughout multiple design sprints, I iterated on the design based on stakeholder input, ensuring that the final version balanced both user needs and technical capabilities.
Outcome: The redesigned dashboard significantly improved user navigation efficiency, resulting in a 25% reduction in support tickets related to dashboard confusion and increased positive user feedback regarding ease of use.
UI Brilliance: Showcase Your Design Prowess in Your Portfolio
Approach your portfolio with the same care and attention to detail as your other projects—it’s likely your most important, and definitely your most personal, design project. The layout, navigation, and visual design should reflect the best of your skills as a UI designer.
In this video with Morgane Peng, Design Director at Societe Generale CIB, learn how to establish your portfolio’s visual identity—fonts, colors, layout—and how to ensure accessibility.
ShowHide
video transcript
00:00:00 --> 00:00:36
Most people are really excited about this stage of making their portfolio and indeed it's time to work on the visual identity of your portfolio. I'll introduce here the main visual elements that you need to define and although those elements need to reflect you and your identity, I will also cover the good practices of making your portfolio easy to navigate for your visitors. Fonts and typographic scale are usually made of the following: a heading for your page titles, subheadings for your section titles,
00:00:36 --> 00:01:00
lead text for bigger text sizes like in hero areas, your intros or quotes, body text to use for most of your content, and caption text to use as captions for your images or embedded elements. I'd like to mention that it's usually okay to choose one font that is different for your headings compared
00:01:00 --> 00:01:31
to your body text, but I would recommend using a standard font for your body text. These fonts are standard for a reason: they are easy to read and you actually don't want to strain the eyes of your reader, especially if they've been looking at portfolios all day long. Colors I use for the following elements: text color, usually black or dark gray, don't go too light as it may make your text difficult to read and not accessible. The reverse applies if you want a portfolio in a dark
00:01:31 --> 00:02:00
theme. A dominant color for your main call to actions like buttons and links, a supporting color for your secondary actions, usually less vibrant and less saturated than the dominant color. An accent color, if you're including illustrations or pictures, you can be intentional and choose an accent color and use touches of it for your portfolio. Some background colors, usually a combination of white and grays, to organize your content sections. Again, if you're doing a dark theme, they will
00:02:00 --> 00:02:30
be a combination of black and dark grays. And unless you're an expert in visual design, don't go crazy with colors. Use online palette editors to help you choose and calibrate your colors. A grid system. If you're designing your portfolio for the web, you will also need to define your grid system, similar to when you do it for your digital projects. Things to consider are, for example, what's your maximum width? Do you want to center your content on one main column or use
00:02:30 --> 00:03:02
layouts and organize content into two or three columns? You can also play with grid offsets to structure your content as long as it's consistent across your portfolio. Responsiveness, again, here for the web, you need to care about how your content is displayed on various screen sizes, usually desktop, tablet, and mobile. You can rely here on the web builder tools that you choose to use and their behaviors, or if you have code knowledge, you can do it with media queries and flex boxes.
00:03:02 --> 00:03:34
Accessibility. Your website must be accessible. If your case studies showcase your work on accessibility but your portfolio is not, well, it may constitute a red flag for hiring managers. And finally, a logo. A well-crafted logo can be a big plus for your portfolio's visual identity. However, it is not mandatory at all. If you don't have a strong background in visual design, I would even recommend not to have any logo at all as it can be badly designed and play against you.
00:03:34 --> 00:03:57
If you are a UX designer with no visual background at all or maybe a UX researcher with no visual background, then I would actually recommend you to use templates online. Choose one that you can customize, again using palette editors to make sure that your colors are consistent. But you can play around with that and also, as usual, get feedback on your work and iterate from there.
Here are some general tips for your portfolio’s design:
Simplicity and intuitiveness: Keep your portfolio clean, with intuitive navigation that makes it easy for clients and recruiters to find key projects and information.
Consistency in visual design: Use consistent colors, typography, and spacing across your portfolio. The details in your portfolio should match the precision you bring to your work.
Avoid clutter: A user-friendly, simple presentation shows you understand how to create intuitive and effective designs.
Bring Your Designs to Life with Storytelling
Storytelling captures attention, describes the journey of each project, and—more importantly—shows depth of thought and a commitment to user-centered design.
You can bring narrative into your case studies by considering these questions:
What inspired the design? Was it user feedback or a specific business challenge?
How did you iterate? Show how you adapted the design based on feedback, user testing, or other constraints.
What did you learn? Reflection on your work helps recruiters understand your ability to grow as a designer.
Time and again, storytelling is the top recommendation for design portfolios. In this video, hear directly from design leaders, such as Vitaly Friedman of Smashing Magazine and Pablo Stanley of MushoAI, as they share valuable insights on what they look for in a portfolio.
ShowHide
video transcript
00:00:00 --> 00:00:41
Your portfolio is like a friend who can speak highly of you to any potential employers or clients. I want to fall in love with how you present your stuff. These are your technical tasks. I'm not just looking at your technical expertise; I'm interested in your journey. The one thing, in my opinion, that beats empathy is experience. I want to see the thinking. I'd look for evidence of them having built components, them having an understanding of what components are, and if you can do that, then the world's your oyster. That's really kind of what I look for. I want to see the thinking process. I want to see why some decisions were abandoned or
00:00:41 --> 00:01:05
why some directions were abandoned and what was chosen instead. I would say, for me, it's not that important what methodology exactly you're using, but I would still love to see that, of course. But the more important part is that you can argue why you decided to move in that way, and that "why" should not be based on assumptions, not "because I felt like" or "because I had a feeling that."
00:01:05 --> 00:01:34
That doesn't go in my book. You need to have some objective language in use that clearly explains that this is objectively better. And again, you can always say, "Well, drop-downs are faster," or "This is faster." Well, ideally, you would need to have data to prove that. The more thinking, the better. I mean, personally, I have sometimes situations where somebody would just draw a solution on paper and give it to me, and as long as I can follow and understand what the process
00:01:34 --> 00:02:01
was like and why this thing has been chosen, that's all I need. That's fine; that works for me. If you're looking for a job, most of the time what you want to convey through your portfolio is that you've reached the competency levels. To do that, I would say any kind of project or any kind of format to show that you've done the work will work. It could be a fake project; it could be
00:02:01 --> 00:02:32
a real project. Sometimes it doesn't even have to be linked to a Figma prototype, because I know we tend to be very, very obsessed with tooling. For example, I have someone that I've been mentoring who had a past experience in video editing. Something they've been doing is actually working in a clinical office to enhance the engagement with patients. To do this, they actually made
00:02:32 --> 00:03:07
a bunch of videos of the doctors just to feel a bit more approachable, so it's not just a screen between the patients and the doctor. To me, that is user research. This is also understanding the problem, the creative ideas, and yes, maybe the outcome is a video and it's not a screen design. But if he has this project and some UI exercise, then yes, for me, he'll be able to do UX work. A few things, and I'm trying to answer this fast, okay. Work on some components,
00:03:07 --> 00:03:32
even if it's just for your own products. Show that you have an understanding of what component design is. Then I would work quite hard on a couple of aspects, and these are hard skills, by the way. I'd focus on learning about typography, spacing, all that good visual design stuff because it is important in design systems. And then finally, work on your writing skills. Being able to communicate well, especially written communication, is really
00:03:32 --> 00:04:03
valuable. I'd look for evidence of them having built components, them having an understanding of what components are, of what a design system is. And yeah, just try and read about it. I'm not looking for anything polished; that is just the end product. I'm interested in your journey. So it doesn't matter if you're junior or senior, I want to see your process: how to go from one step to the other, what is the problem, how do you approach presenting it in a
00:04:03 --> 00:04:34
way which is user-facing, how do you write feature specs, how do you take it to a wireframing state, how do you create low-fidelity, high-fidelity user interfaces. Anything you are building should not be based on an opinion. You should give me data. You should say, "I did this because I did competitor benchmarking. This is what worked in other games. People connect better with characters, so it was a good way to introduce that meta feature." But also, what did you do? Even if you are just a student, did you build that prototype, and did you do some kind of mock testing with another player just to say, "I also tested it
00:04:34 --> 00:05:05
with somebody who's never used this feature. This is the feedback I've got." Show me your process, show me your journey, show me your objectivity. That is what I want to look at. On a junior level, if you are applying for mid or senior level, I'm not just looking at your technical expertise, which I know you will have. I also want to see soft skills: how good are you at collaborating, how good you are at taking criticism and feedback, how good you are at defending your decisions, how good you are at taking initiative, how good you are at aligning your stakeholders. So my general rule of thumb is everybody who's
00:05:05 --> 00:05:31
hired needs to be good, including a director, because I have to get hands-on also many times. They should have solid or technical skills with potential, but the higher up you go, I want to also see more of your soft skills: leadership, collaboration, and all that stuff. I think the biggest thing is storytelling. To me, basic skill. That's the beauty of it.
00:05:31 --> 00:06:02
I think a lot of this stuff is sketching, it's whiteboarding, it's customer interviewing, it's being able to speak with a variety of team members and get them all to a single story that actually makes sense to the customer. Really being able to balance opposing viewpoints and say, "Well, let's make two prototypes. Great, it seems like we can't come to an agreement. Let's make one like this and one like this and test it." I've done it many times in my life, but if you've ever done any
00:06:02 --> 00:06:35
prototyping or any kind of sketching or ideation, that is just kind of your basic technique, just taken to the next level. And with AI, there are so many Legos for you to play with and so much opportunity. And if you can do that, then the world's your oyster. That's really kind of what I look for: being able to do all these things, but also facilitate this discussion about how far you can take it. And of course, everyone's got some Figma skills. I don't think you need to be a huge
00:06:35 --> 00:07:00
Figma jockey for this thing. Once you've come up with the idea, it's just a matter of documenting using your design system components. Hopefully, you do have a design system; I hope you do, all right. My advice for portfolios, whether it's design systems or not,
00:07:00 --> 00:07:35
is the same. You should tell the story of the project. So don't think that a design system project versus a different type of project has to be structured differently or has to be structured in a specific way. Focus on the milestones that happened in that project, the challenges that you overcame, and what you delivered, and tell that story. That should help you to just have a consistent story arc and really focus on the project dictating the case study,
00:07:35 --> 00:08:02
not you having to fit every project into a very cookie-cutter format. In portfolios, if I were to apply for a job, I would not just be like, "Oh, I've done this little AR app and I've done this little VR project," but I would make sure how it connects to the users and who this was designed for. One of my projects that I would
00:08:02 --> 00:08:32
personally lead with if I were to apply for a job is probably this inclusive gym that I've created. It was a smaller project for me. It's not in my main research portfolio, but it allows children in wheelchairs to exercise and play games with each other. Actually, from an AR perspective, it's not particularly technically challenging or hard, but at least it would demonstrate how I think about this space and what kinds of AR and VR solutions I want to create.
00:08:32 --> 00:09:00
Where I see my responsibility. In a design portfolio, I'm a very visual person, so I want to fall in love with how you present your stuff and with the style, with your typography. Typography, that's the first thing I see in the portfolio. If you're not taking good care of your typography with your character length, your line height, hierarchy, all that stuff,
00:09:00 --> 00:09:36
that's already like I'm done with you. I don't want to see you; I don't want to know anything about you. Get out of here. No, it's just like, in the web, everything we do as designers, a lot of it is text. Most of it is text. So I look for that care and attention to detail in a portfolio. That's the first thing I notice, and actually, it's not because I'm looking for it. It just instantly pops for me. I see it's like, "Ooh, ah." It's like, "Ah, you tried. You
00:09:36 --> 00:10:02
tried. Close." I know it's cruel, but sometimes if you have a lot of portfolios you're seeing and you don't have a lot of time, you're just looking for excuses to close that window. You're looking for excuses to filter out people. That sounds cruel, I know, but that's how recruiters work. They have to filter out people because they may have a lot of options, and they're just looking
00:10:02 --> 00:10:36
for excuses. So don't give them that excuse. I'm going to say something a little bit controversial: don't write the whole design process, all that thing like that cookie-cutter template design process that I'm pretty sure you didn't even follow. You just reverse-engineered it and put it there in your portfolio. Tell me a story. I want to be entertained. I know that sounds now even cliché. It's all about storytelling, but it really is. We're humans,
00:10:36 --> 00:11:02
and we just want to gather around the fire and be told a story before we go to sleep. And in these stories, you can be the hero. All the challenges that you went through, "Oh man, we tried this and it didn't work, but that allowed me to learn, and then I overcame my challenges, and I became the hero of this story." You can be the hero of that story. It can be your user. When you
00:11:02 --> 00:11:36
were doing user testing, you found out something. Tell that story of that person. It could be maybe it is actually the company. They were struggling and they were trying to get to a new market or something. Tell me that story. I want to be entertained. We all want to be entertained. If I'm going to be looking at your portfolio, you better have good typography and a nice story. Empathy is really, really important, right? We talk about empathy a lot as user-centered
00:11:36 --> 00:12:06
designers, as human-centered designers. But the one thing, in my opinion, that beats empathy is experience. Portfolio-wise, specifically, I really want to see a breadth of experience there. The reason why is that I think more than anything, if you have worked for startups and also larger enterprise companies, if you've worked on mobile products and you've also worked on desktop products, if you worked for enterprise systems and consumer-facing products, B2B, B2C,
00:12:06 --> 00:12:33
that means that you've seen a range of different needs of the user. And that also means that in entirety, when you're working on these different projects and you're consuming the research that it takes to build these products, you're in a place where you really understand what the user needs. So if you have actually experienced what the business needs and also what the user needs,
00:12:33 --> 00:13:02
if you've experienced how to toggle between the two, then I can look at that and I can be like, "Well, you look like you can learn a lot." With AI, especially for ethical AI, what I think needs to be done is that there needs to be a lot more assessment and quality on designers that showcase a breadth of learning and a breadth of implementation of that learning. When I'm interviewing people, or especially when I'm teaching, what I typically like to
00:13:02 --> 00:13:29
do is I like to really, really encourage my students to go in and just explore the world and explore the ways that they can implement strategies in different ways, and also fail. That's a really big part of being a designer. I don't even consider the vocabulary of failure as something that I have in my book because I don't consider it failure. I just consider it, "Oh, it's a learning lesson. We just learned something."
Seal the Deal: Invite Connection and Action
After you’ve impressed hiring managers with your portfolio and projects, guide them to take action. Whether you’re looking for freelance opportunities or full-time roles, your portfolio should make it easy for clients or employers to connect with you. Your call-to-action (CTA) should get straight to the point, and here’s an example:
“Interested in a UI designer who values both form and function? Let’s discuss how I can contribute to your project. Get in touch to discuss how we can collaborate.”
Last—but not least—make sure that your contact information is easy to find, with links to your email, LinkedIn profile, or a contact form.
The Take Away
Use your UI design portfolio to showcase how you think, solve problems, and bring ideas to life—it deserves more than just the final product. Highlight how you apply visual design principles—like hierarchy, balance, and contrast—to create effective and engaging user interfaces. To make your portfolio stand out, tell the story behind each project. Highlight the problems you tackled, your role in the solution, and the impact of your work, whether it’s through metrics, user feedback, or other results.
Make sure you emphasize your versatility by including a variety of project types, from responsive web designs to complex dashboards. This breadth of work doesn’t just show your adaptability but also demonstrates that you’re ready to tackle any UI challenge. Include examples of your collaborative efforts—how you worked with developers, UX researchers, and other team members to create cohesive, user-centered solutions.
Your portfolio should reflect the best of your skills, with thoughtful attention to layout, navigation, and visual consistency. Treat it as your most important design project—one that showcases not only polished visuals but also the depth of your design thinkingand your dedication to intuitive experiences.
Finally, remember to use storytelling to breathe life into your work—walk hiring managers through your journey, the obstacles you faced, and the decisions you made. End your portfolio with a clear call-to-action, so it’s easy for potential clients or employers to reach out. With these elements, you’ll transform your portfolio into a powerful tool that captures attention, communicates your value, and ultimately helps you land your next opportunity and chance to shine for yourself, the brand, and the users and customers who love the brand even more because of your work.
References and Where to Learn More
Want to create a portfolio that gets you hired? Take our course, Build a Standout UX/UI Portfolio: Land Your Dream Job, and learn how to showcase your skills, tell compelling project stories, and impress employers.
We want to show you a tool so vital that it may amaze you as a designer. It’s as underrated as silence between musical n
1.2k shares
4 years ago
Open Access—Link to us!
We believe in Open Access and the democratization of knowledge. Unfortunately, world-class educational materials such as this page are normally hidden behind paywalls or in expensive textbooks.