User Story Mapping is a crucial technique for visualizing product development from the user's perspective. Here, we outline essential components and steps for crafting a User Story Map. You’ll learn how User Story Mapping can help create engaging and effective user experiences through different examples and practical tips and tools for mapping user stories.
Consider a scenario: a team developing a new app struggles to align their vision with user needs. They have extensive documents like product requirements and technical specifications but do not understand the user experience.
People don't have the time or focus to read technical specifications fully. Even if they do, they usually misunderstand what to build. Instead of boosting productivity, these long documents limit creativity, communication, teamwork and new ideas. That’s where you can use user story maps as a better option. They offer a clear view of what an agile team plans to build.
So, let’s talk about user story mapping in more detail. You'll find this helpful if you’re a designer, product manager, or eager to enhance user experiences.
Table of contents
What is User Story Mapping?
User story mapping is a visual tool that helps product managers and development teams plan work that creates an excellent user experience. A software leader, Jeff Patton, developed and spread knowledge about this method.
In this video, Laura Klein, UX designer and author, explains what user stories are and how to create them.
User story mapping in UX design involves activities, steps, and details. You outline a typical user's interactions with a product. You identify the most valuable steps for the user and decide what to build next.
Activities focus on high-level tasks like "Plan a vacation"
Steps like "Select Destination" detail how to complete an activity.
Details show specific interactions, such as "Browse destinations" or "View images" under the particular step.
User story maps guide teams in planning their minimum viable product (MVP) release. They visually map out what to include in the initial and future releases. Teams draw lines on the map to separate what goes into the MVP from what can wait for later. The team places items above the line for the MVP and below the line for future updates. As they learn and reprioritize, they add new activities, steps, and details to the map for upcoming sprints and releases.
Agile organizations find user story mapping useful as an alternative to simple backlog lists or long requirements documents. It has become a key strategy in user-centered design and agile product development.
User Story Maps vs User Stories
User Stories are individual narratives focused on specific functionalities or requirements from the user's perspective.
User story mapping first outlines the user's journey with the product. Teams then extract specific user stories from this map. Each story focuses on a particular functionality. This process aligns all development work with the user's overall experience.
While user stories focus on small, specific features, user story maps offer a big picture of a product and provide the context of specific features. Agile teams can use these maps to prioritize smaller tasks and turn them into user stories. These stories help you validate and build a common understanding of the steps needed to create a product users will love. You write these stories in a specific format: "As a [type of user], I want to [action] so that [benefit]." This format helps you focus on product interactions from the user's perspective.
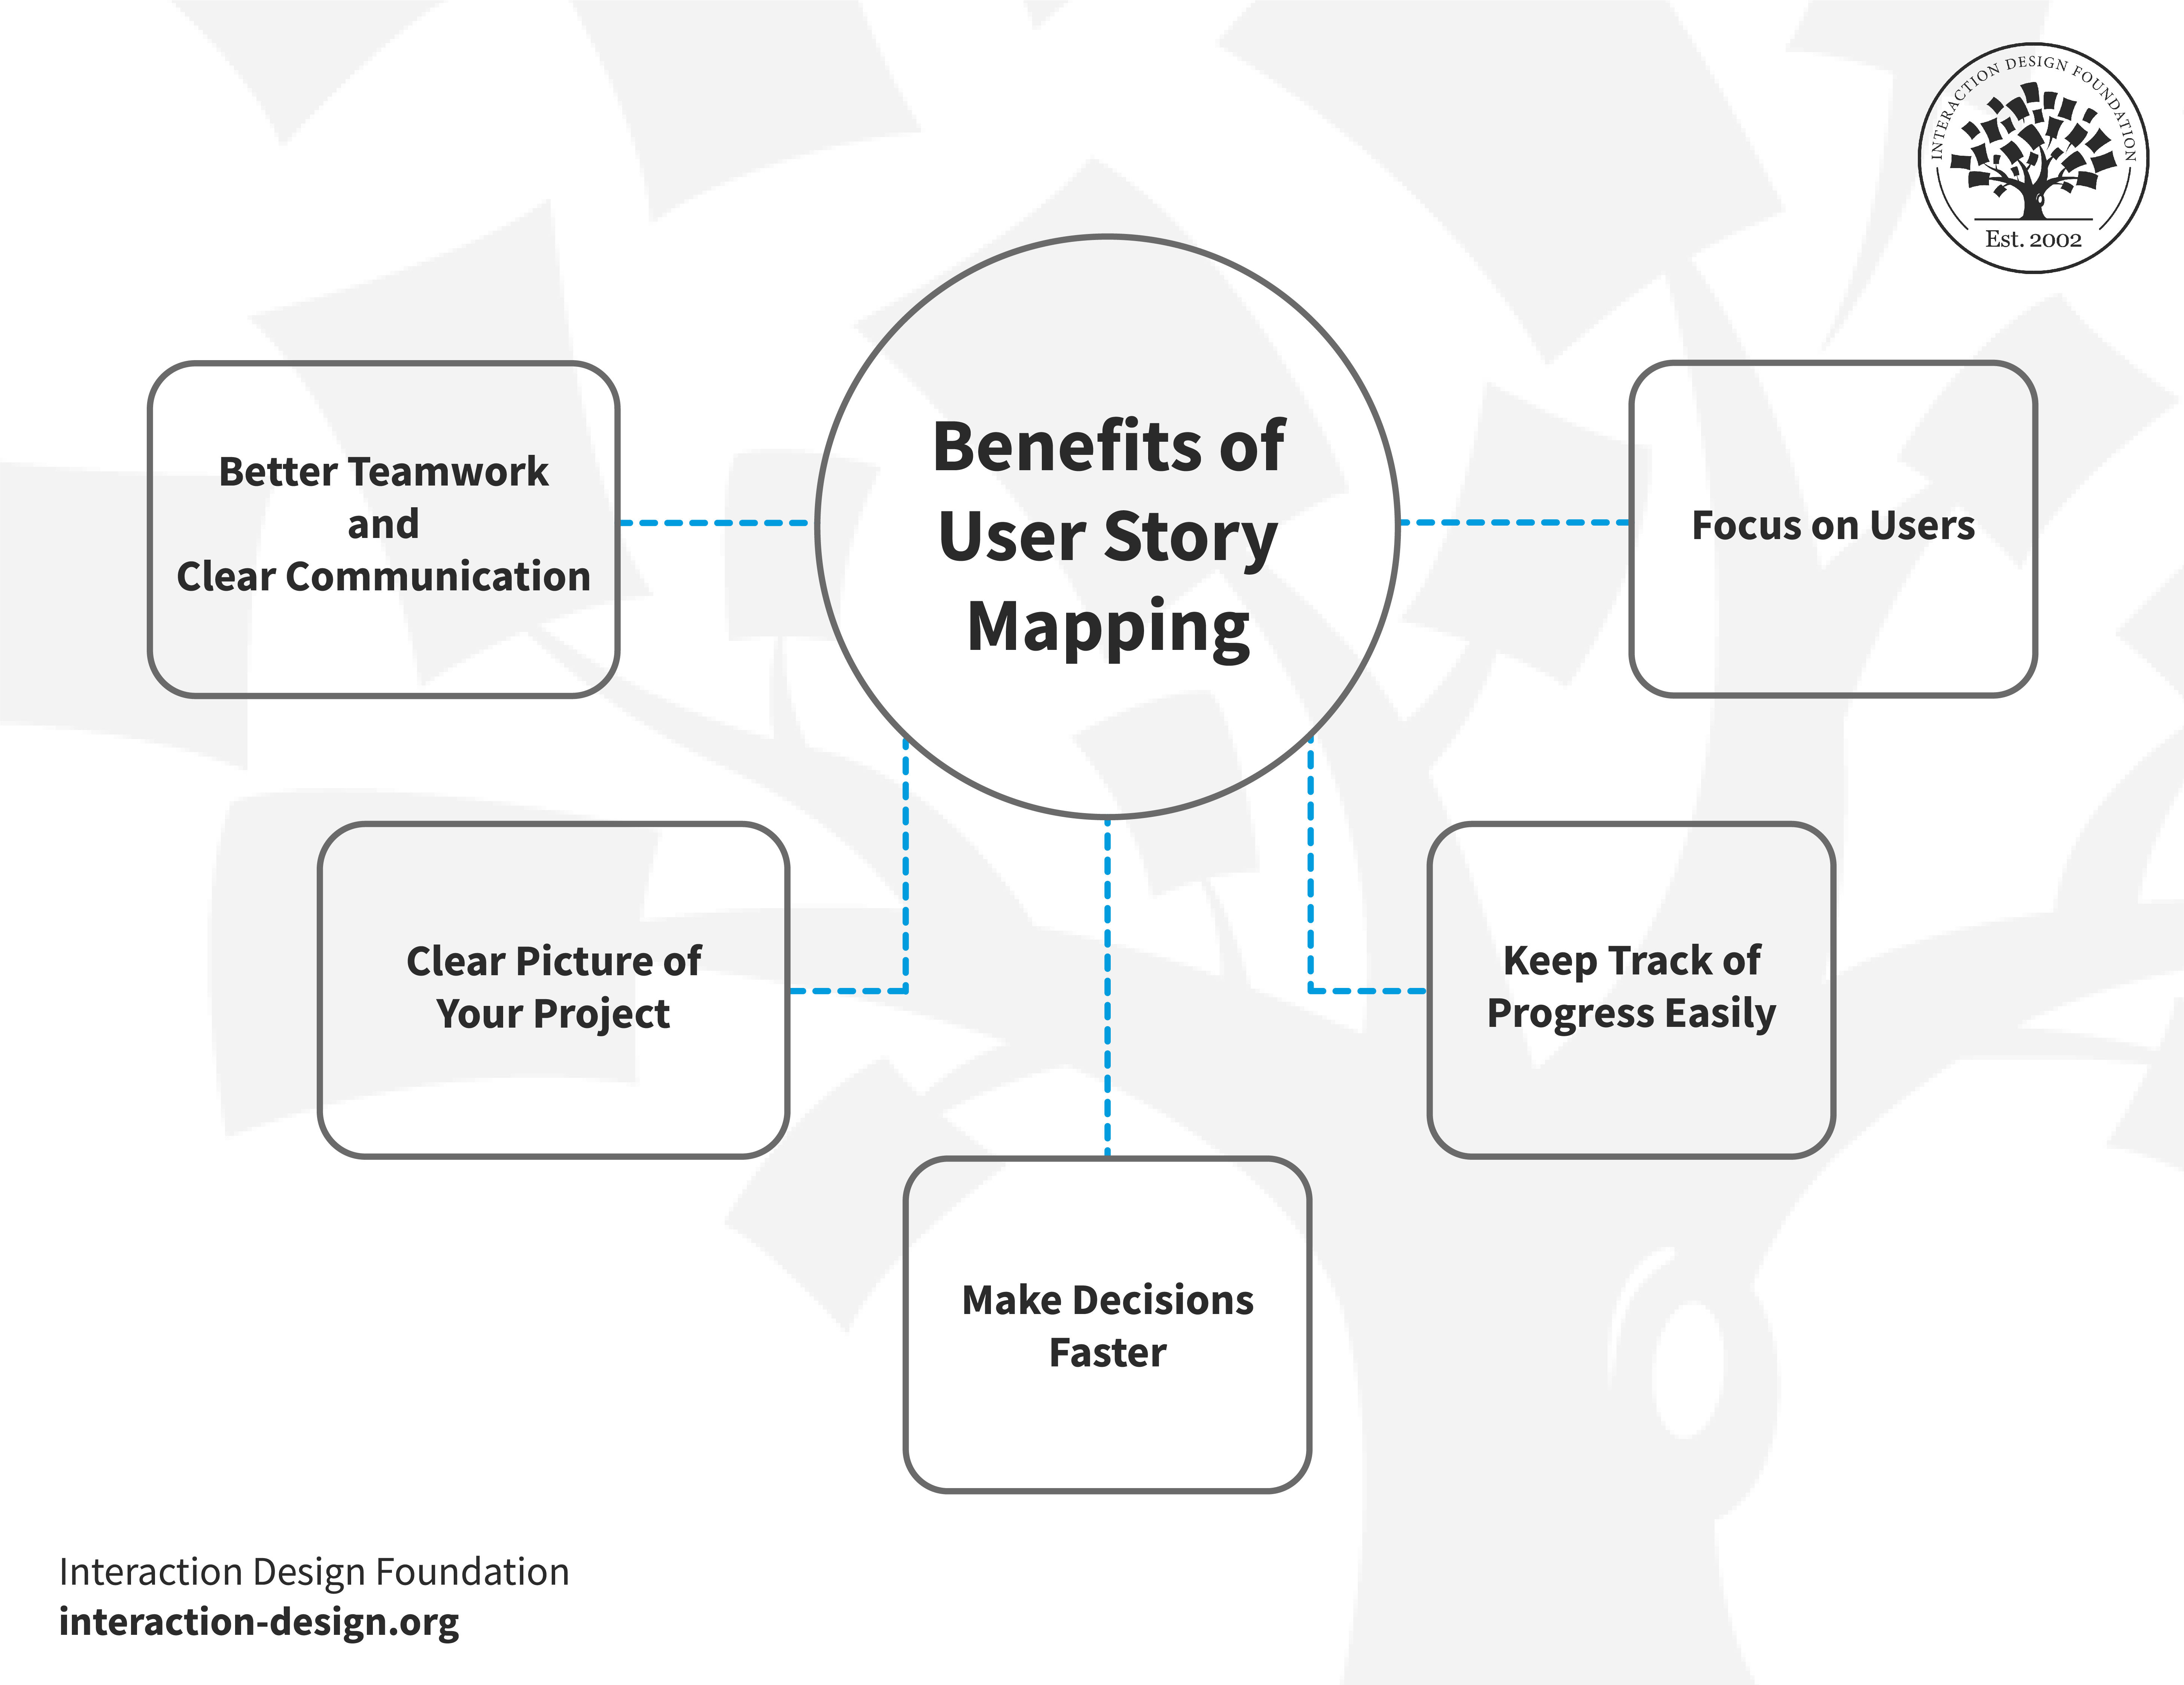
The Benefits of User Story Mapping in UX Design
User story mapping transforms how teams approach product development, especially from a UX design perspective.
© Interaction Design Foundation, CC BY-SA 4.0
1. Focus on Users
When based on user research, a user story map shows the product from the user’s perspective instead of a technical one. This user-centric approach drives satisfaction by focussing on understanding and prioritizing user requirements.
2. Better Teamwork and Clear Communication
User story mapping unites the team with a shared vision. It reduces misunderstandings and fosters better teamwork. It establishes the context for the individual user stories so teams can develop better solutions.
3. Clear Picture of Your Project
User story mapping in UX design focuses on visualizing the user's journey with a product. Imagine a roadmap showcasing every feature and user interaction. This map helps teams see how individual parts form the whole picture. It's like piecing together a puzzle, where each piece represents a user's step or a product feature. Mapping user interaction becomes clearer and guides the team to prioritize effectively.
4. Make Decisions Faster
The user story map helps teams identify the minimum viable product, allowing them to ship products incrementally, with just the right level of detail, without shipping a broken experience.
5. Keep Track of Progress Easily
This method can act as an alternative to traditional backlogs. It provides a transparent view of the project's status and lets teams detect gaps in the user experience early on.
User Story Mapping Examples in Design
Here are three user story mapping examples to help you understand the concept better and visualize how you do it.
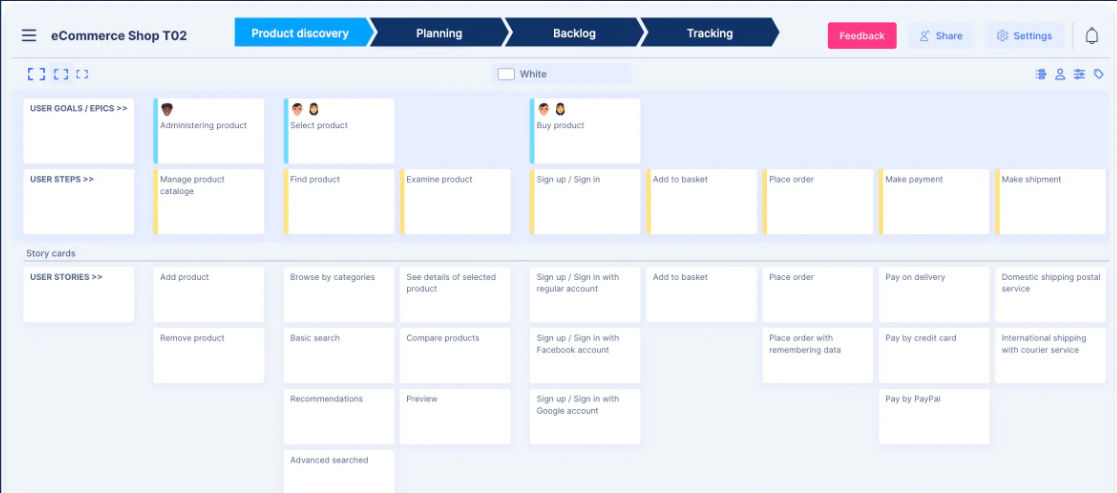
1. E-commerce User Story Map
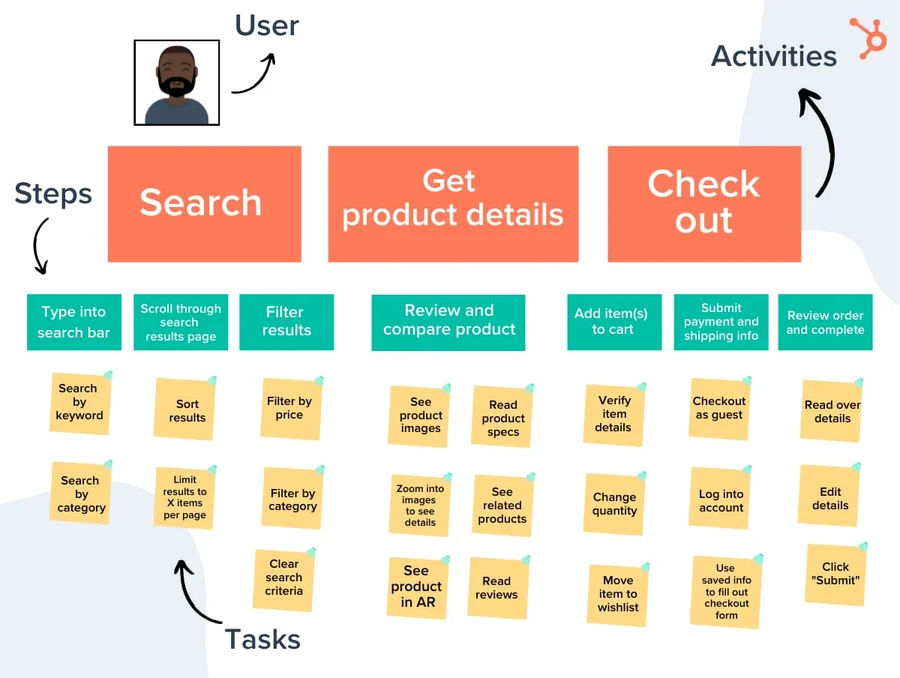
© Hubspot, Fair Use
In this example, we focus on the detailed journey of a user engaging with an e-commerce platform.
The Activities (in orange) represent the primary goals of the user, such as "Search," "Get product details," and "Check out."
Within these activities, Steps (in green) outline the necessary actions to achieve these goals, like "Scroll through search results" under "Search" and "Review and compare product" under "Get product details."
Finally, Tasks ((in yellow) detail the individual actions for each step, including "Filter by price" or "See product in AR."
This user story map facilitates a clear understanding of the user's journey. It can help teams prioritize development to create a user-friendly and efficient path from search to purchase.
2. Document Management User Story Map
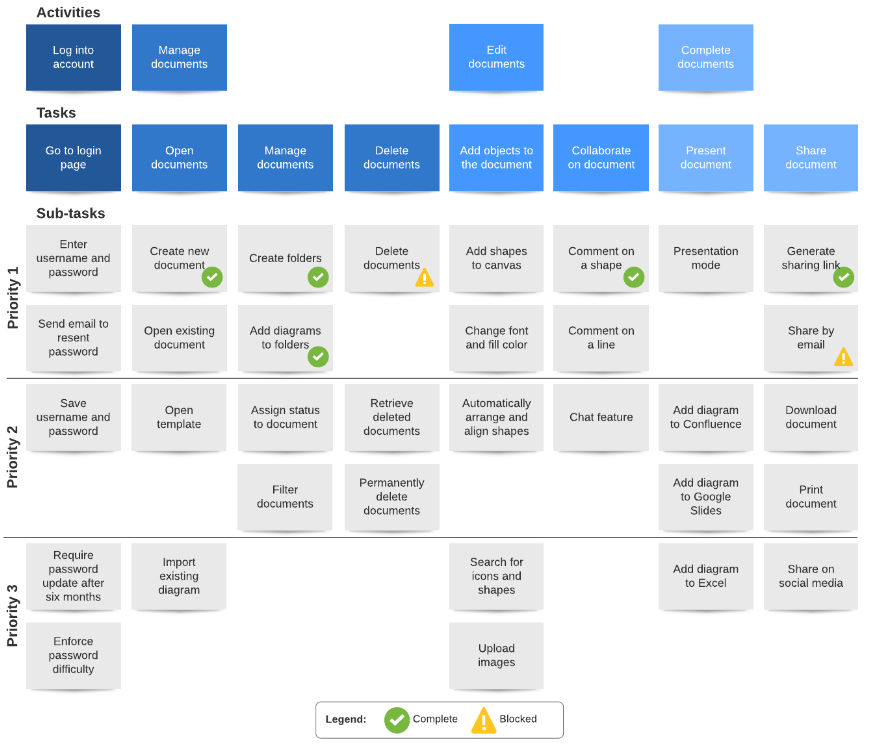
© Lucidchart, Fair Use
This user story map is a structured visual that outlines the user experience for a document management system. It is broken down into three main components:
Activities (in blue) show the high-level goals or functions within the system, such as "Log into account," "Manage documents," "Edit documents," and "Complete documents."
Steps/Tasks (in blue) detail specific actions within each activity. For example, under "Manage documents," the tasks include "Open documents," "Manage documents," and "Delete documents."
Sub-tasks (in gray) provide an even finer level of granularity. They describe individual actions required to complete the tasks. Under the task "Open documents," we find subtasks like "Create new document," "Open existing document," "Open template," and "Import existing diagram."
Each task and sub-task receives a priority ranking from top to bottom. The map assigns these rankings on the left, ranging from Priority 1 to Priority 3. The color coding on the subtasks—green for complete and yellow for blocked—provides an at-a-glance status report on where each action stands.
The best part about this example? You can use it as a user story mapping template to start your mapping journey.
5 User Story Mapping Tools Worth Trying/ Top 5 User Story Mapping Tools
Exploring the right tools can significantly enhance your user story-mapping process. These five tools stand out for their ability to simplify and streamline the mapping of user stories.
© Interaction Design Foundation, CC BY-SA 4.0
1. Jira Software
© Jira Software, Fair Use
Jira offers comprehensive agile project management features, including user story mapping add-ons. Teams committed to agile methodologies find this tool helpful as it integrates well with other development tools.
2. Trello
© Trello, Fair Use
You can easily adapt Trello's simple, card-based interface for user story mapping. Its flexibility and intuitive design make it an excellent option for teams looking to organize their development process visually.
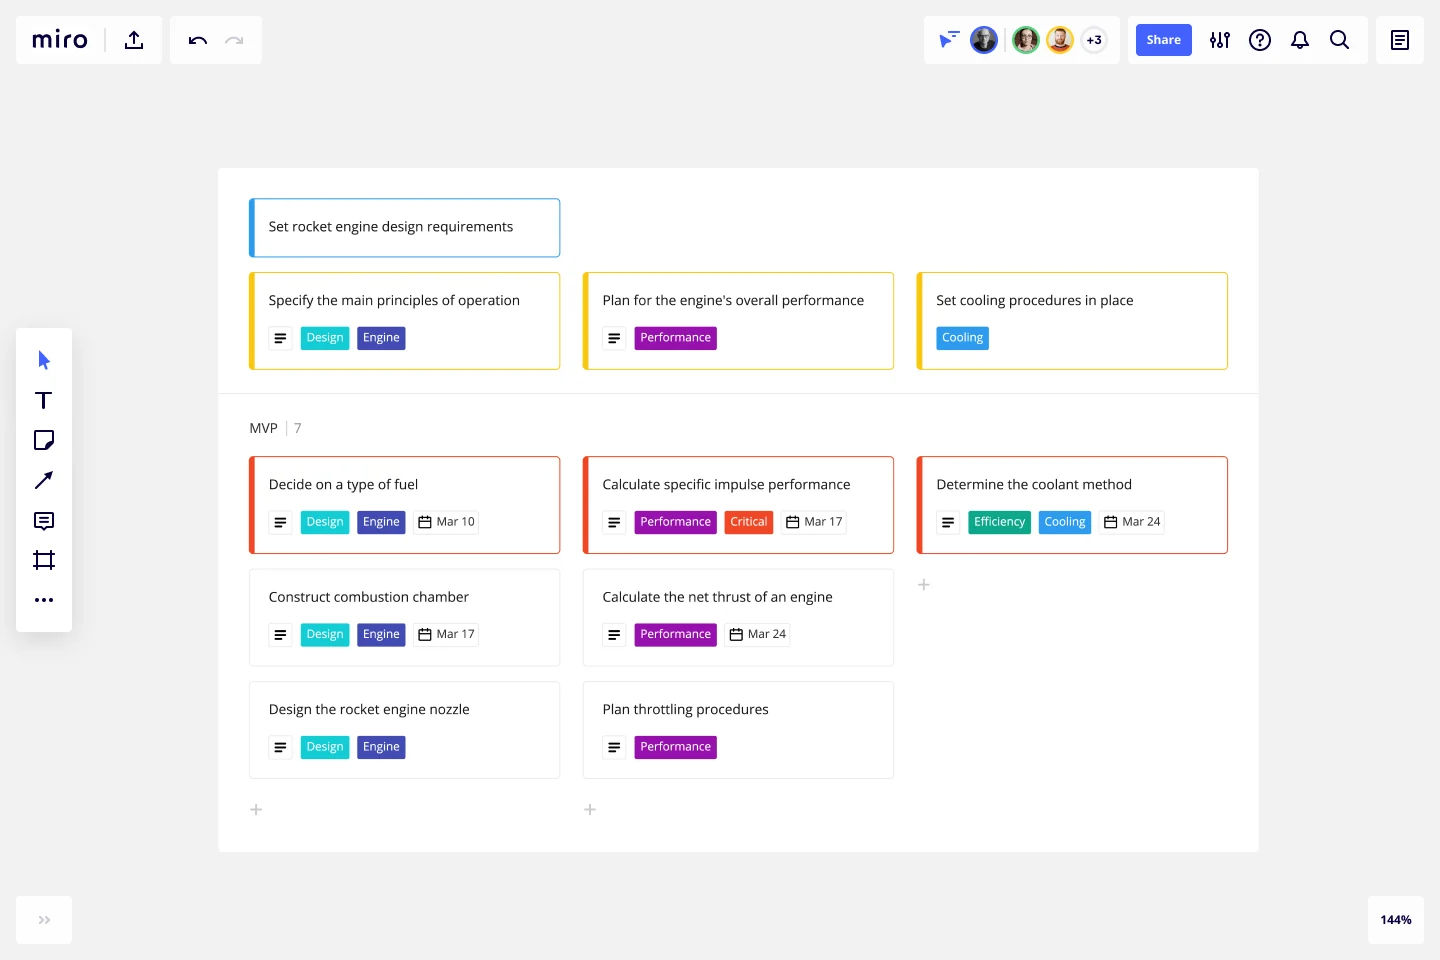
3. Miro
© Miro, Fair Use
Miro is a user story mapping software that provides an expansive virtual whiteboard perfect for user story mapping. Its collaborative features allow teams to work together in real time, regardless of location.
4. Lucidchart

© Lucidchart, Fair Use
Lucidchart offers a range of diagramming tools that you’ll find useful to create detailed user story maps. Its drag-and-drop interface and collaboration capabilities make it a solid choice for mapping complex user stories.
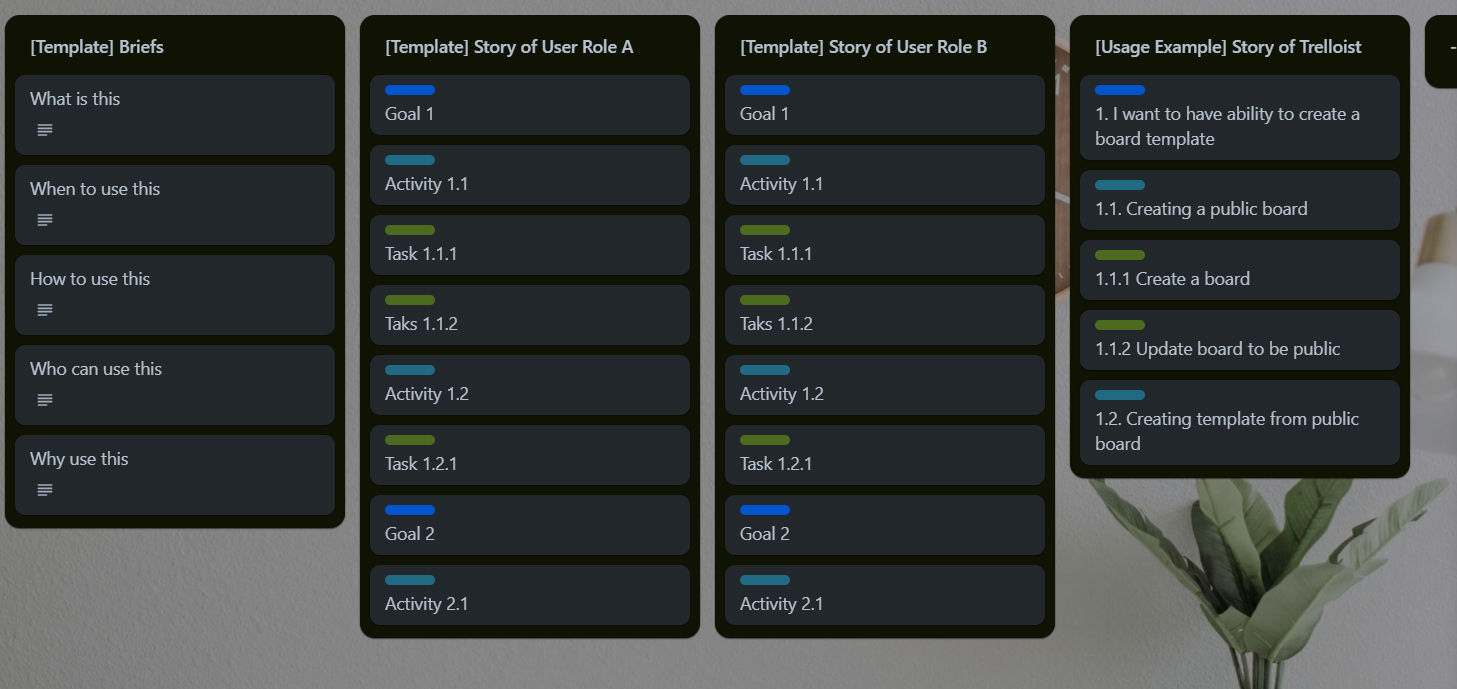
5. StoriesOnBoard
© StoriesOnBoard, Fair Use
StoriesOnBoard is one of the best user story mapping tools that turns customer feedback into actionable user stories. The user-friendly tool focuses on enhancing the product development cycle from the user's perspective.
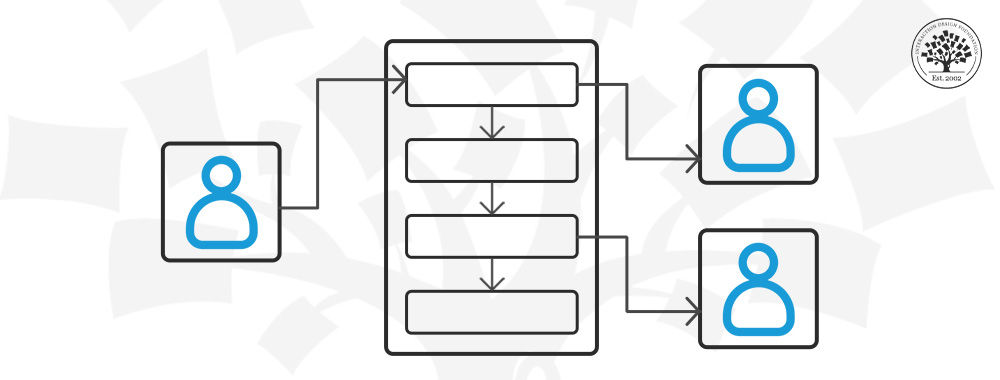
How to Run a User Story Mapping Session
Running a user story mapping session can streamline your development process, align your team and ensure your product meets users' needs. With careful planning and execution, this method can transform your approach to building user-centered products.
© Interaction Design Foundation, CC BY-SA 4.0
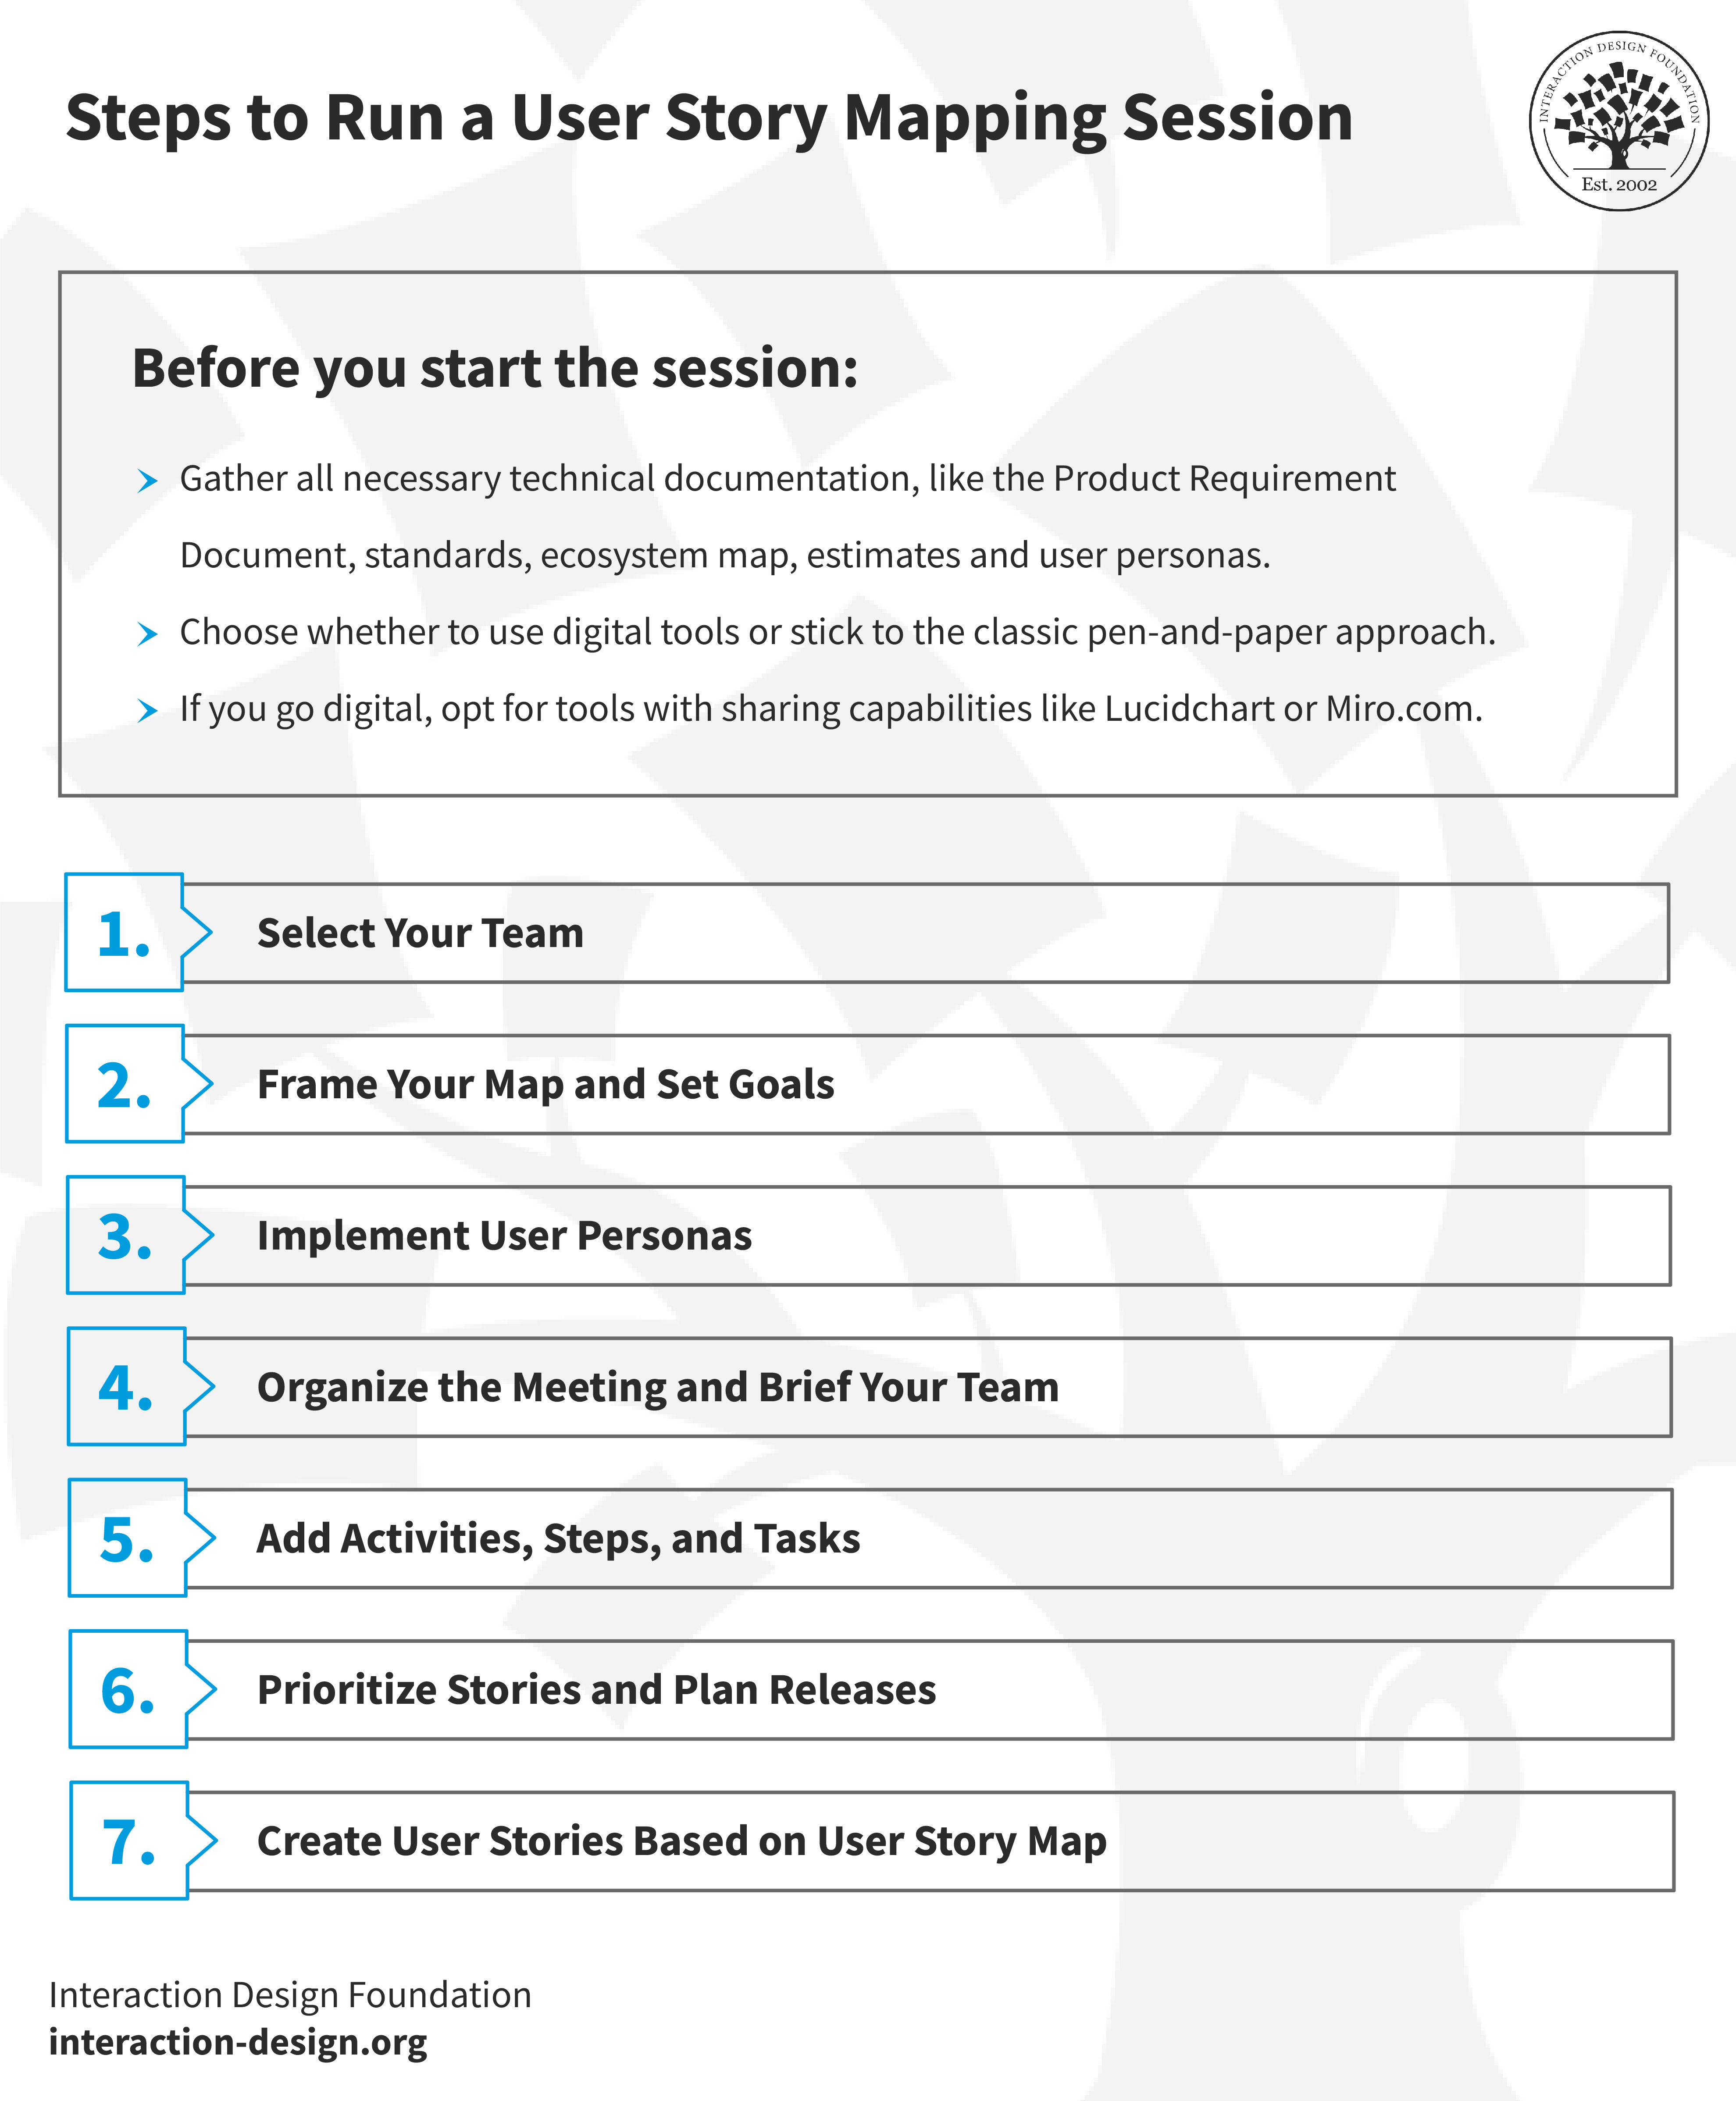
Preparing for the Session
Before you start:
Gather all necessary technical documentation, like the Product Requirement Document, standards, ecosystem map, estimates and user personas.
Choose whether to use digital tools or stick to the classic pen-and-paper approach.
If you go digital, opt for tools with sharing capabilities like Lucidchart or Miro.com.
User personas in story mapping represent target users. They guide feature development to meet specific needs and preferences. Frank Spillers, CEO at Experience Dynamics, discusses why personas are important and how to create them.
Step 1: Select Your Team
Choose the key people for your mapping session. Limit your workshop to no more than 10 decision-makers from various departments, including a product owner, UX designer and stakeholders. A smaller group promotes easier and more effective discussions.
Step 2: Frame Your Map and Set Goals
Set clear boundaries for your user story map to avoid scope creep. Concentrate on the Minimal Viable Product (MVP) to focus on essential features. Decide on additional sections like ideas or thrash and if you'll use color coding for clarity.
MVPs in user story mapping identify essential features for focused development and early user feedback collection. Laura Klein explains MVP in more detail.
Step 3: Implement User Personas
Base your map on user personas to guide the story's epics and activities. This ensures you address real user needs and behaviors in your product.
Step 4: Organize the Meeting and Brief Your Team
Explain the mapping process once you choose the team and have the tools ready. Make everyone comfortable and outline the session's structure and expectations. Clarify the map's layout, including any color codes or sections.
Step 5: Add Activities, Steps, and Tasks
User story mapping aims to define the entire product from the user's perspective. This process involves adding activities, steps, and tasks to the map.
Activities represent high-level user goals in the product.
Steps break down these activities into more specific actions.
Tasks further detail these steps with granular interactions.
Reading the map from left to right should reveal the user's journey from start to finish. This horizontal view shows the sequence of user interactions. On the other hand, reading from top to bottom should highlight prioritization. This vertical view helps you understand the most important features or tasks you should tackle first.
Incorporating these elements into the map provides a comprehensive, user-focused view of the product development lifecycle. It ensures that every feature aligns with user needs and that the team prioritizes effectively.
Step 6: Prioritize Stories and Plan Releases
Sort user stories based on importance. Use visual cues like tape or digital tools to define different releases, starting with the MVP. Discuss and agree on features essential for the initial release.
The team draws or tapes lines to mark release boundaries. They place essential features for the MVP above this line. Features suitable for later releases go below the line. This clarifies the development team's immediate focus and outlines a roadmap for future updates. As the project evolves, the team adds new activities, steps, and details to the map, which inform the planning for future sprints and releases
Step 7: Create User Stories Based on User Story Map
The last step involves using the user story map to create user stories. To create user stories from a user story map, follow these steps:
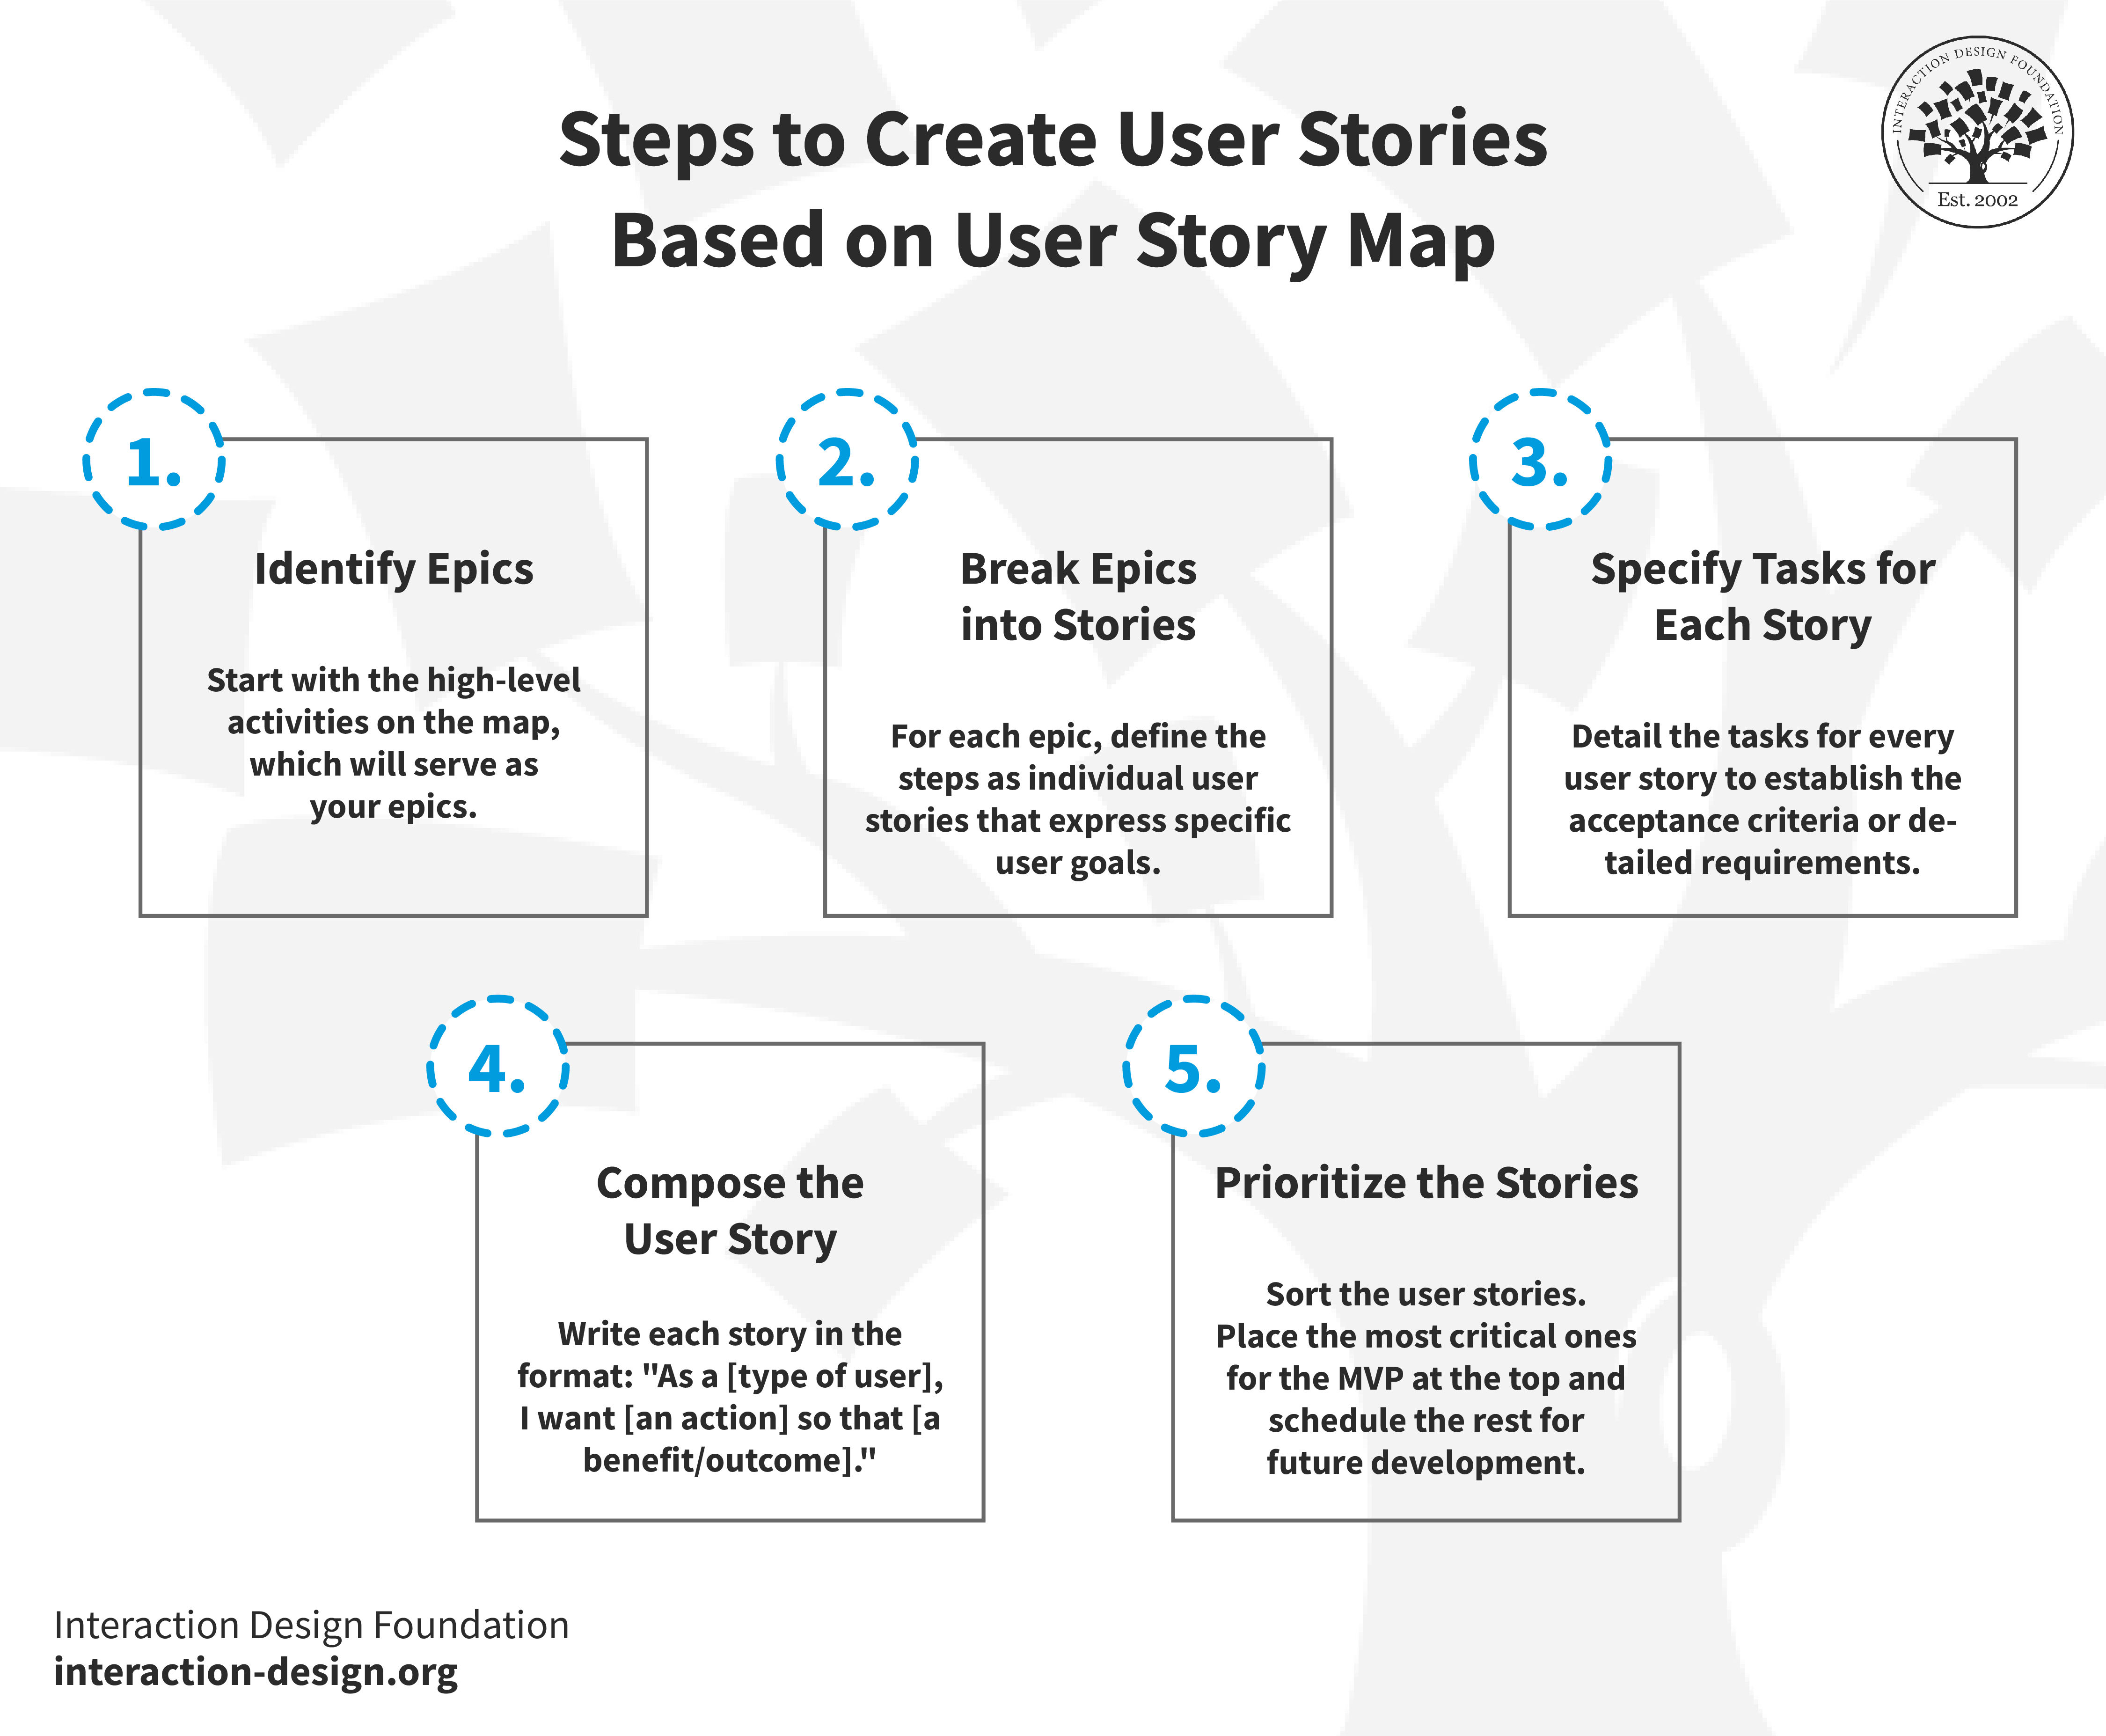
© Interaction Design Foundation, CC BY-SA 4.0
Identify Epics: Start with the high-level activities on the map, which will serve as your epics.
Break Epics into Stories: For each epic, define the steps as individual user stories that express specific user goals.
Specify Tasks for Each Story: Detail the tasks for every user story to establish the acceptance criteria or detailed requirements.
Compose the User Story: Write each story in the format: "As a [type of user], I want [an action] so that [a benefit/outcome]."
Prioritize the Stories: Sort the user stories. Place the most critical ones for the MVP at the top and schedule the rest for future development. Use the story map's structure as a guide.
This process turns the visual user journey into a prioritized backlog of user stories, ready for the team to tackle in a focused and user-centric manner.
User Story vs Customer Journey Mapping
User-story and customer journey mapping serve distinct purposes in product development and user experience design.
Customer journey mapping is all about stepping into the shoes of your users. It illustrates a user's journey to achieve a goal with your product. It captures their emotions, the channels they use, and the devices they interact with. The mapping creates a narrative highlighting the user's experience from start to finish. It focuses on the emotional highs and lows.
Journey maps provide you with information from a customer’s perspective. Watch this video to understand the power of journey mapping as Matt Snyder, Head of Product & Design at Hivewire, discusses it.
On the other hand, user story mapping looks at things from the product's perspective. It helps teams plan and prioritize the product's features based on the problems they solve for users. It focuses more on functionality. Thus, it helps you turn insights from the customer journey map into actionable items for product development.
Both tools work well together or separately. They start from the same research but focus on different parts of design and development.
The Take Away
User story mapping can help you visualize the product journey, focusing on user activities and steps. This method breaks down complex projects into manageable parts. It aligns development with user expectations and business goals. It helps:
Visualize the Customer Journey: User Story Mapping offers a clear, step-by-step view of how users interact with a product. This helps you identify areas for improvement and ensures a user-centric design approach.
Enhance Collaboration and Clarity: Mapping out user stories helps your team gain a shared understanding of project goals and user needs. This improves teamwork and communication.
Prioritize User Needs: This technique ensures that development efforts align with what users value the most. It leads to products that truly meet user demands.
Start familiarizing yourself with the basics to apply user story mapping. Then,
Understand the components of user story maps and how they fit into a larger map.
Consider exploring digital mapping tools like Jira, Trello, Miro, Lucidchart, or StoriesOnBoard.
Run a user story mapping session, focusing on user needs and product goals.
This approach can transform your development process into a more user-focused and efficient one.
Where to Learn More
Agile is one of the most misunderstood methodologies in software development. Laura Klein breaks down common “anti-patterns” and how to avoid them in this hour-long Master Class.
Read more about product development and user story mapping from Jeff Patton and associates.