Your constantly-updated definition of Sketches in UX/UI Design and
collection of videos and articles. Be a conversation starter: Share this page and inspire others!
620shares
What are Sketches in UX/UI Design?
Sketches are preliminary, hand-drawn representations of a user experience—including user research outcomes, user interfaces and interactions. They serve as a quick and cost-effective way to explore design concepts and communicate ideas before investing time and resources into more detailed wireframes or prototypes. Sketches are typically rough and informal, emphasizing the conceptual over the precise which allows designers to iterate rapidly and gather feedback early in the design process.
In this video, Designer, Teacher and Illustrator, Mike Rohde describes using five basic shapes to simplify sketching and focus on conveying ideas rather than creating art.
ShowHide
video transcript
00:00:00 --> 00:00:30
So, the way we get into drawing simply is by using what I call the *five basic elements of drawing*. And I think these are really important, especially if you are coming to this course and you feel like "I can't draw"* – remember the asterisk – "as well as I would like." So, the important thing about this is this changes an approach
00:00:30 --> 00:01:00
to your drawing; it moves it away from art and to ideas. So, my mantra is "Ideas, not art." And I think this is a foundational part of what I believe in. Not that there's anything wrong with art; it's just that art has *baggage* with it. You can draw like a little suitcase here. Art has baggage. It has baggage from junior high school when someone drew better than you or you felt like your drawing skills were not as good as you wished they were.
00:01:00 --> 00:01:32
And that's very natural. So, we're here to help you through that. So, what are the five basic elements of drawing? Well, the first one is a *square*; second, *triangle*; third is a *circle*; fourth is a *line*; fifth is a *dot*. So, the square of course can be a rectangle or something like that. A triangle can be all kinds of shapes.
00:01:32 --> 00:02:00
A circle can of course be stretched into an oval. Lines don't have to be straight – they can be squiggly. And if we really wanted to talk about it, the dot is really the foundation of all these. These are all dots that are lined up in a certain order. But it's much easier to remember five elements. And there's also a reason why I chose five elements – it's because they're easy to remember when you're in the heat of the moment.
00:02:00 --> 00:02:30
So, let's flip the page here, and we'll go to drawing with these five basic elements so you can see how this mindset works. All right, so let's draw with the five basic elements: square, triangle, circle, line and dot – any order. I just happened to choose that order. Now what I'm going to do is show you what I mean
00:02:30 --> 00:03:01
by this simple way of drawing. So, let's start with a simple one. So, if you have your pen, write 'house' here. I'm using green to set it apart from the drawing. So, on a house you can get away with – if you want to call it that – a square and a triangle on top. Right, that would be enough to communicate the idea of a house. But you can go further, and you're still using these same elements.
00:03:01 --> 00:03:32
You use a rectangle, which is – you know – a stretched square. You can do a line here, and now you've got a window on your door of your house. A dot can be your doorknob. You can put another window up in the attic, let's say, and then a rectangle for a smoke stack or chimney. And then, finally, what about a curvy line? And that would be the smoke coming from the chimney. And now you've got a house. So, you can see it can be as simple as two objects or many objects based on the time you have. And the cool thing about it is
00:03:32 --> 00:04:01
you could start with a very simple one and after you do your sketchnote you can come back and fill those in. So, let's do another one; let's do 'book'. How would I communicate 'book' in the simplest form? So, one thing I'll say about this approach of five basic elements of drawing is it's a little bit of a game. So, you can see here I've done a rectangle and a line down the middle or two rectangles next to each other, I guess you could say. It's very, very simple, but it communicates the idea of a book,
00:04:01 --> 00:04:30
especially with the word below it. And this is really important. This idea that *words and pictures work together* in Sketchnoting is really critical. It's really important because you have the power of both and they support each other and they add to each other, which is a positive. So, you can see I could stop here. So, the game is: how *few elements* can I use to communicate an idea? It's a little bit like the game Pictionary – how few things can you use to draw to get your team to recognize? – a similar idea in some sense.
00:04:30 --> 00:05:02
But you can also, just like with the house, *add more detail*. So, let's add another line below and connect it. And what you may notice is, even though it's just a two-dimensional drawing, what I just did sort of suggests to your mind that you're actually seeing dimensionality. This can really be reinforced if you have, say, a gray marker and you run a gray marker here. It reinforces it; there's shade here; that there's depth, light's on the top, shade on the side. But all you've done is drawn a line and connect it.
00:05:02 --> 00:05:33
So, when you start thinking about that, really what you're doing is you're *providing enough information* for your brain to *interpret* this object as something. And that is a huge weight off your shoulders because now you don't have to be a great artist; you simply have to draw this object well enough that your brain can interpret it properly. So, let's add some more detail, so books have text on the pages. Now, this is quite small, so I wouldn't try to draw text, but we can do lines, and now this suggests that we've got text on the page.
00:05:33 --> 00:06:03
Some books also have images. So, let's draw an image – a square. I'll put a triangle in there – maybe it's a photo of a mountain – and then finish with two more lines. So, now it's getting the feeling that it's a book with text on the pages. There's a picture, and it's got some depth to it, which is kind of cool. Now, the third one I'm going to show you is coffee, one of my favorite drinks. So, you might start thinking if you're going to draw coffee, now you have to think about
00:06:03 --> 00:06:32
perspective and circles and "Oh, I'm not good at circles!". Here's another trick around this approach: stay *two-dimensional as long as possible*. This really reduces the stress on you. And if you can communicate an image in two dimensions, then do that. Don't feel compelled to draw in dimensionality or in proportions if you're not comfortable with that yet. That may be a later skill. So, stay two-dimensional as long as possible. And I'll show you what I mean by that.
00:06:32 --> 00:07:00
If you have a cup of coffee – let's say it's one of these cafeteria cups – why can't you just simply use rectangles and draw the side view? It still will represent as a cup of coffee. So, let's do a half circle here and one inside, so now we've got the handle on the coffee. And then, finally – just like with the house – let's put a little vapor coming off of it. And now you're implying that the coffee is hot. There's a little bit of vapor coming off of there.
00:07:00 --> 00:07:34
If you happen to be a tea drinker, well, all you need to do is write the word 'tea' below here, right? The beautiful thing about this is you're staying simple. It turns into a bit of a fun game to see how few elements can you use to represent the idea of something. It's representative. It's a simplified version. You're *not going for realism*. It *doesn't have to be beautiful*, but it *must communicate the idea* to other people or at least to you if the sketchnotes are for you. So, I think that's really important to think about as you're doing this drawing
00:07:34 --> 00:08:03
and you're seeing how it can impact the work that you do. What I want to talk about now is what happens when you start to practice drawing with these five basic elements. You're effectively building a visual library. What I mean by that is the more often that you draw objects repeatedly, you will then build a library of those objects in your mind.
00:08:03 --> 00:08:30
Now, you can of course have it on a piece of paper that you slide in the back of your notebook, just like this, if you wanted to make a collection that way. But as you draw these things over and over again, you start to build that library in your head. So, finishing the food theme next to my coffee or tea, let's talk about pizza, and specifically a slice of pizza. So, you might be tempted to simply draw a triangle. I would avoid that.
00:08:30 --> 00:09:03
And the reason why is, a slice of pizza really comes from a whole pizza – you should do a curve here, do a second curve in parallel, and now you've got crust. Now, remember the trick I taught you around the book. We can do the same thing here. You just draw another line below there, and now you've got depth to the pizza crust. Now, the other thing I'll show you is if you're going to draw, let's say, pepperonis, have them partially on the pizza. Maybe there's one here. I can fill them in with some shading;
00:09:03 --> 00:09:31
just some lines to give them some depth. And the reason that I say you use a curve is really like – you know – this slice of pizza is coming out of a circular pizza. So, you're reinforcing that it's a piece of a whole without even having to say those things. So, there's a really simple way to draw a slice of pizza. So, what's really interesting is you can actually build quite a few icons. So, let's do a little icon drawing, and then I'll label afterwards to show you
00:09:31 --> 00:10:02
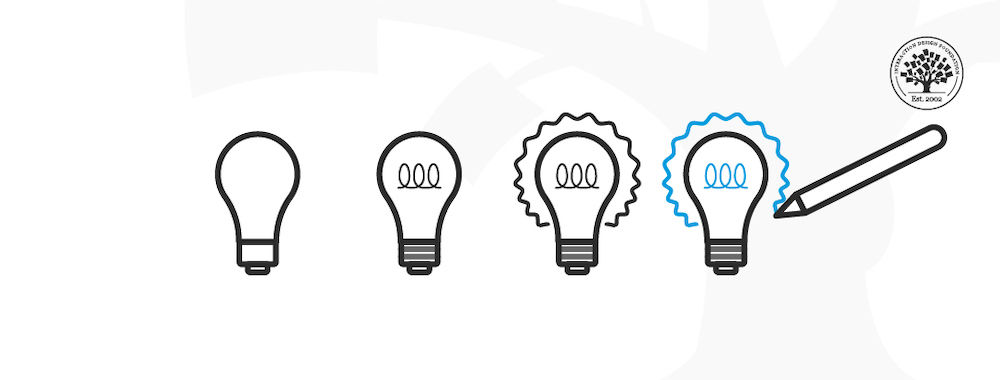
how you can build a visual library that you can use over and over again. If you're someone like me – I'm a designer and I live in the world of deadlines – so, five o'clock on Friday is often a deadline for me. So, I can simply use this symbol in the sketchnotes that I do or the notes that I'm taking to represent a deadline that's upcoming. What about *ideas*? If I have an idea – let's say I'm taking notes about some other subject – I would draw like a little lightbulb like this,
00:10:02 --> 00:10:33
and that could represent an idea really quickly. If I have a challenge of concerns about a project – let's say I'm in a meeting taking notes – I'm very concerned about the timeline. Maybe I make the deadline on Friday, but the overall project is still behind. This would be what I would say 'alert'. And this can clue me into delays or problems of all kinds that might be happening, and I want to indicate that. So, very often for these, I'm actually using
00:10:33 --> 00:11:01
these in the notes that I'm taking; so, if I'm taking notes, more detailed notes, I'll sprinkle these in there. And what they do is help me identify when I scan through my notes, *actions*. So, what's the action here? Deadline on Friday; make sure it's on my calendar; make sure all my tasks are in order and that I'm working toward that Friday deadline. I have an idea. Maybe I need to sit down and write for an hour to express this idea so I don't lose it. But I would write enough that I could represent it later.
00:11:01 --> 00:11:33
So, the next task here would be to sit down for additional time and fill out the details of that idea in a sketch by writing whatever that is. This alert might suggest to me that I need to talk to my co-workers about issues that we see long term around this project that seems to be losing track – like it's falling behind; how can we address this? Is there something we can move back and accelerate this project to get it back on track? So, the last thing that I'll show you is a very useful tool for coming up with icons to build your visual library.
00:11:33 --> 00:12:01
And that is TheNounProject.com. This is a website where you can go, you can search any kind of term, and there will return not one but many different ways to interpret that idea as an icon. And this can be really helpful in building your visual library. If you're looking for certain objects that you use all the time in your work or in your personal life, this can be a really useful tool. I would say the second tool that's good for searching is just Google.com.
00:12:01 --> 00:12:34
And then focus on the image tab when you get the result that you're looking for, and then images will come up. And these can be helpful for just sparking your ideas around how you can simply communicate this concept. So, these are two really helpful ways to think about building icons and building your visual library. The last thing I'll say is if you're in a specific profession, it could be really valuable for you to take time *every day* and *every week* to sit down and make a list of all the words you would love to have icons for
00:12:34 --> 00:13:00
and then build those icons so that you've got those ready to go. And then have a reference that you carry with you. And as you get into meetings, you can have that reference out and you immediately have a symbol that represents those concepts that's always with you. And then, eventually as you do those more and more, you won't even need the card anymore; it'll be burned into your memory, and you can pull those out at a moment's notice on a whiteboard, on your notes, on whatever it is that you want to use.
00:13:00 --> 00:13:26
So, that is a really valuable way to think about drawing in a very simple way and to build your visual library – two really key parts to this whole Sketchnoting thing – because I believe if you can make it over the hump of not drawing as well as you'd like by focusing on ideas like this, then you'll be in a really good position to do the rest and feel confident and move forward and experiment and try things, which we're going to do.
Sketches act as a visual bridge, fostering a shared understanding among stakeholders by providing a tangible representation of design ideas. They encourage collaboration, spark conversations, and facilitate early decision-making by allowing for quick exploration and identification of potential issues or opportunities. Additionally, sketches serve as a powerful tool for building consensus and showcasing a designer's problem-solving approach, ultimately leading to a more efficient and effective design process.
What’s more, sketching demonstrates how UX designers think, approach problem-solving and illustrate their design process. Designers should always show how they arrived at a solution—hiring managers and clients don’t just want to see the final result, they want to see how a designer got there.
When designers show their abilities and unique thought process through sketches, they distinguish themself from other designers—a key factor in getting hired for a fulltime job or freelance project.
Sketches act as discussion points too—particularly useful in interviews as they provide insight into the designer’s process.
How to Sketch for Success: Practical Techniques
Simplify the Sketching Process
Sketching is for everyone—not just for people who are artistic. Everyone has the ability to communicate their ideas visually. To get started, use five basic shapes—circle, square/rectangle, triangle, line and dot—to simplify the process. Early concept sketches, wireframes, user flows and more can all be created with just these basic shapes.
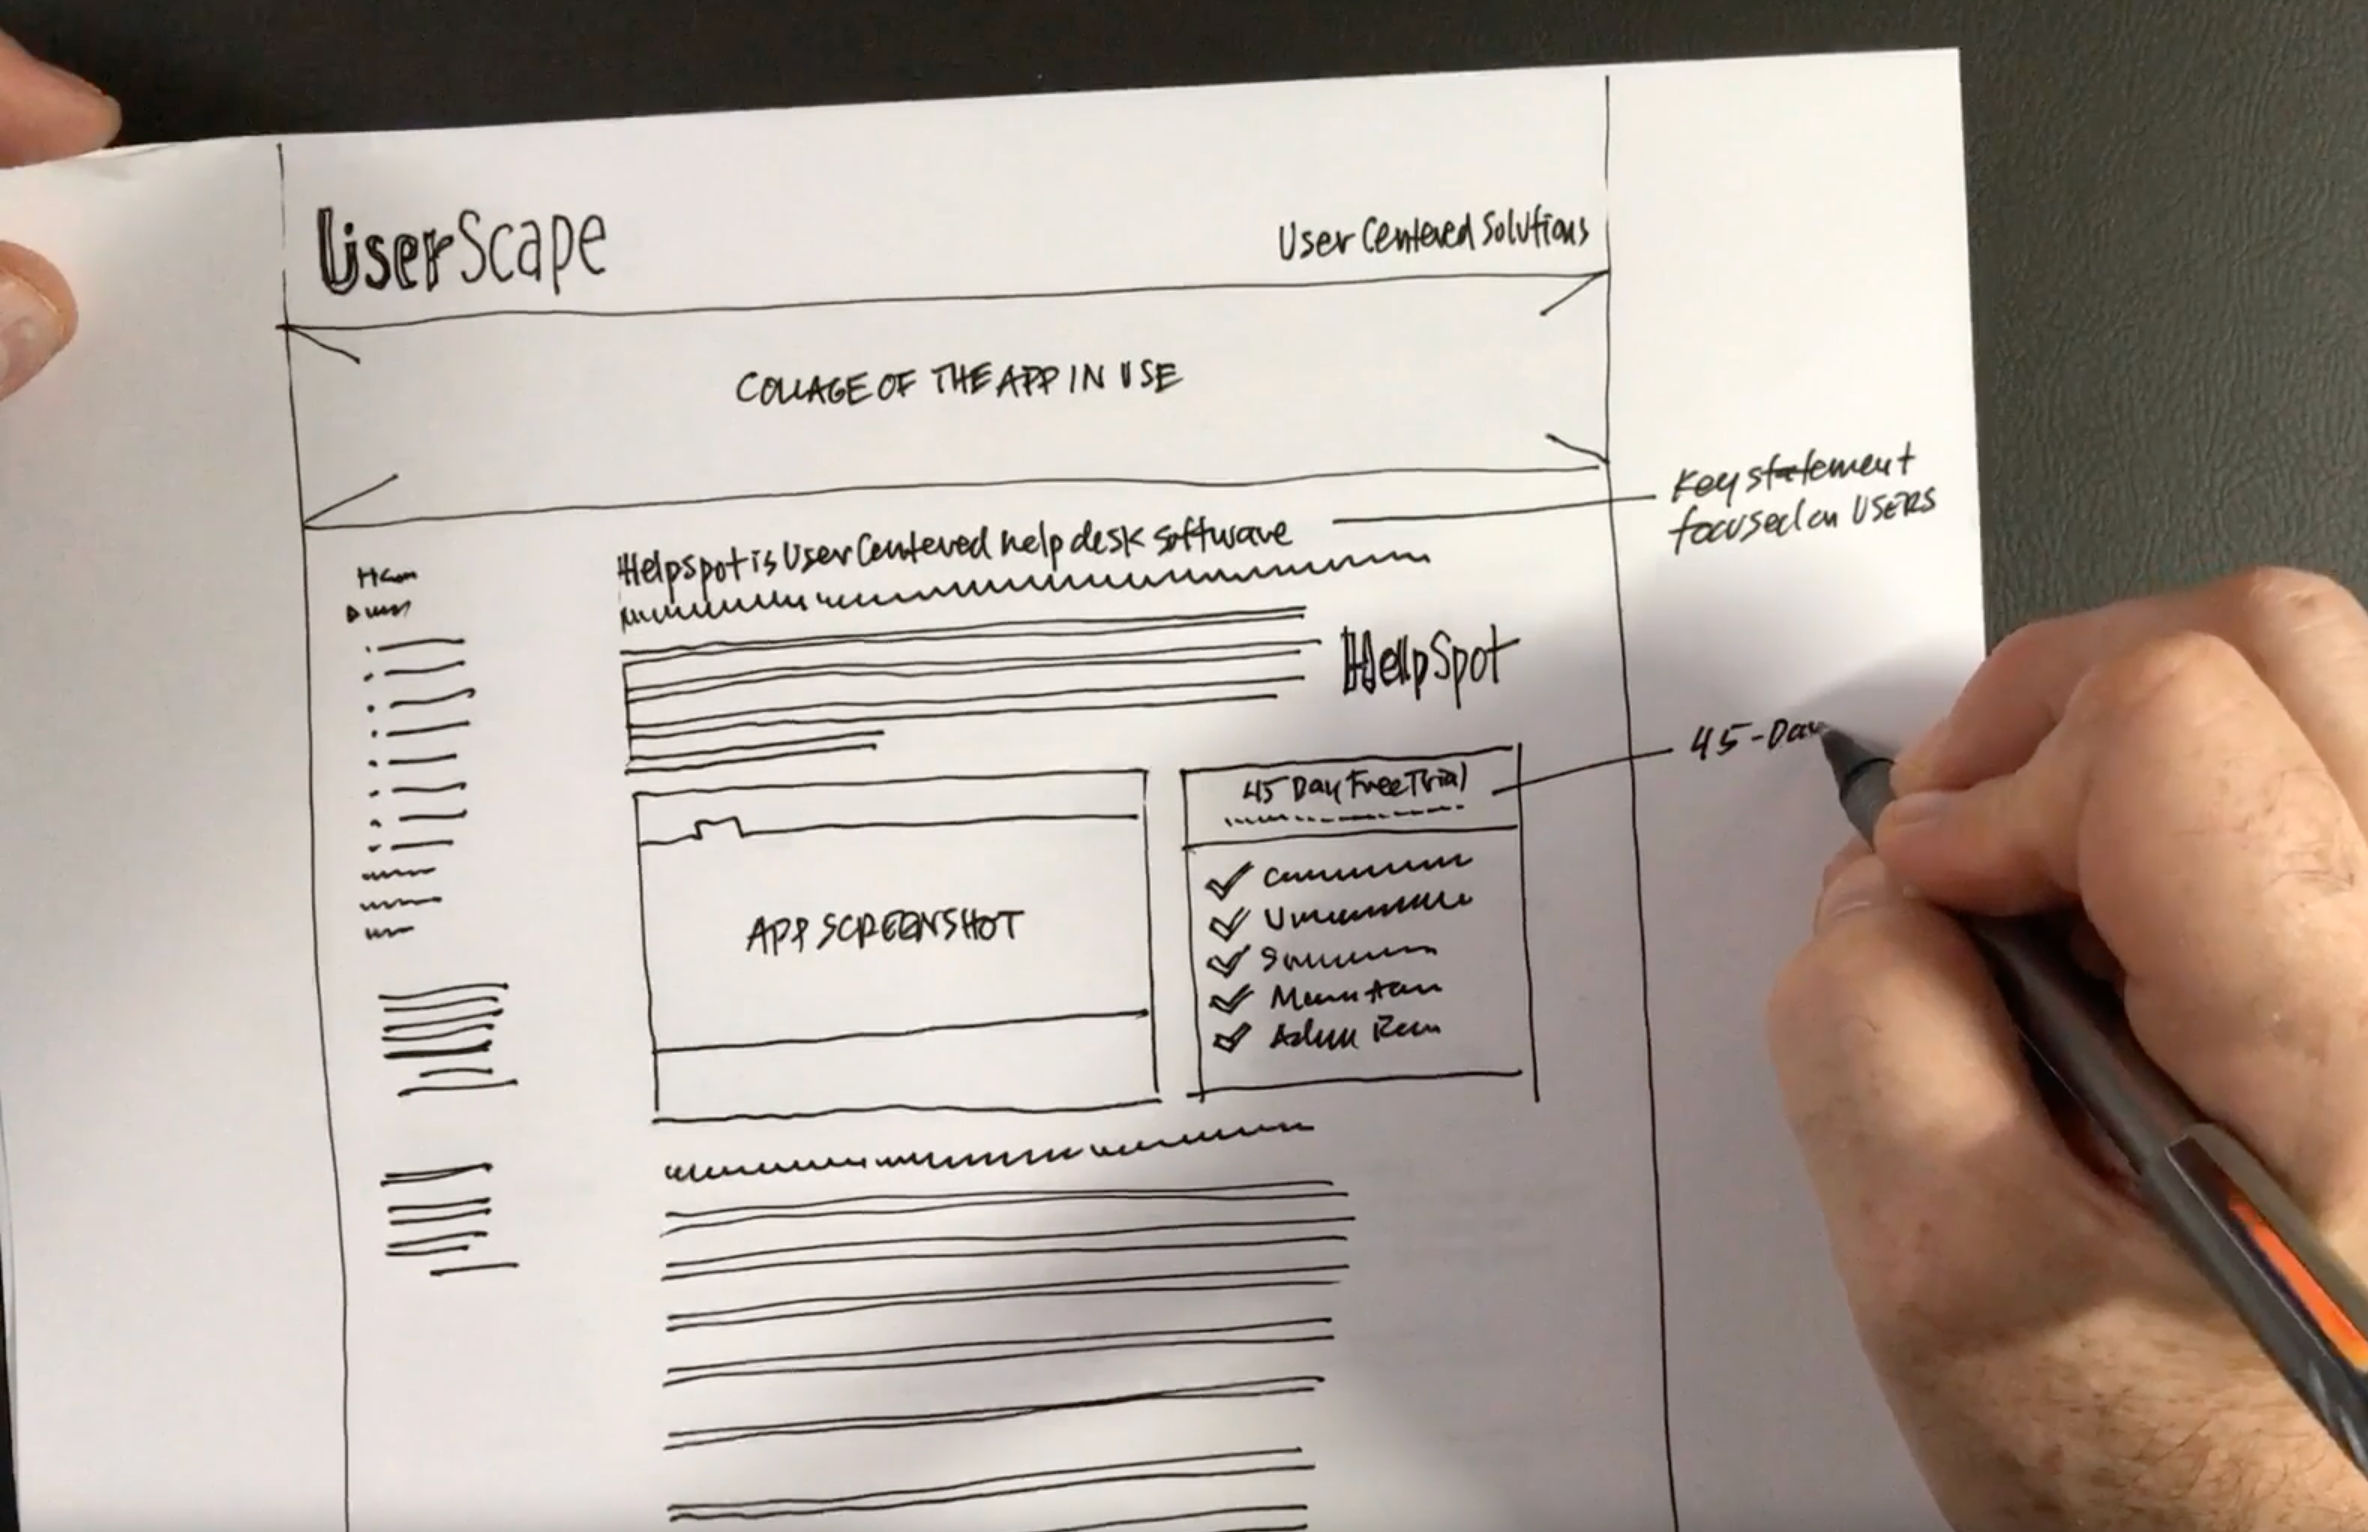
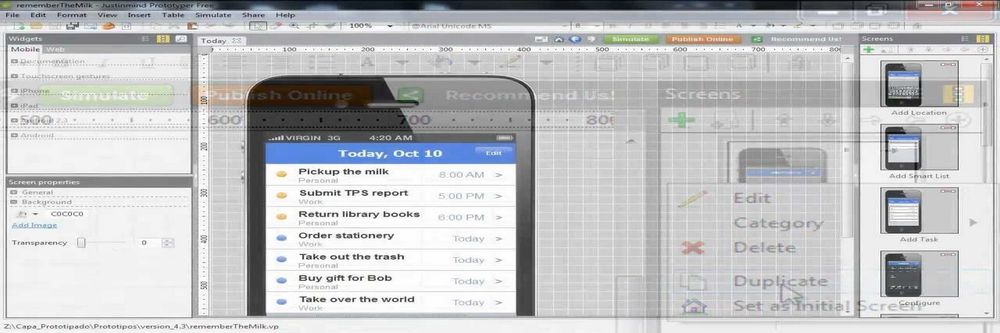
A sketch of a mobile wireframe, created with pen and paper
Start small: Begin with thumbnail sketches to quickly explore ideas. These small sketches can help iterate rapidly without worrying about details.
Use a light touch: Light, quick strokes help keep sketches loose and make it easier to iterate.
Layer drawings: Consider using tracing paper or digital layers to refine sketches without losing the original ideas.
Focus on the key elements: Don’t get bogged down in details; focus on the main components and layout of the design.
Incorporate feedback: Share your sketches with team members or stakeholders early to get input and iterate based on their feedback.
What to Sketch
Sketches can be used for a wide variety of applications—-the entire design process can be sketched out. These sketches do not have to be perfect or particularly neat, as long as they’re legible (to both the designer and the reviewer!). Here are some examples of how the design process can be illustrated, according to different phases:
Discovery Phase
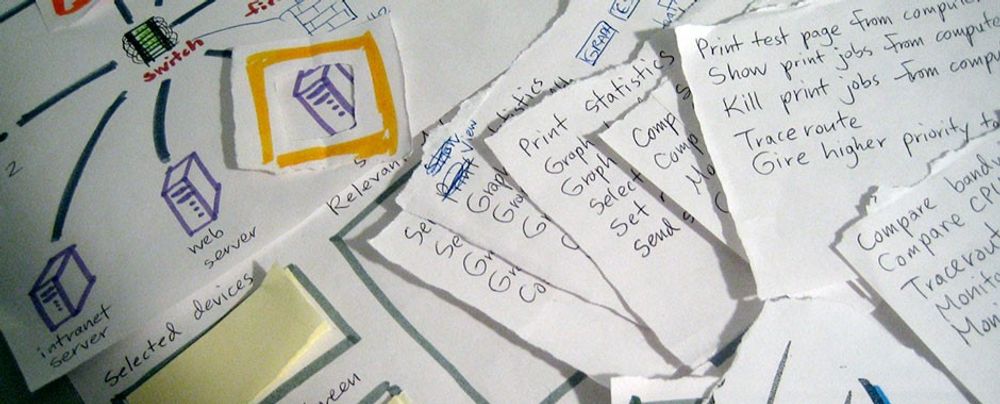
Concept sketches: Start with concept sketches like a mindmap—this captures ideas and thinking. Concept sketches can also include the rough layout, feature ideas or interactions of a design.
Empathy maps: Gain a deeper understanding of user’s emotions, thoughts and behaviors with a hand drawn diagram.
Definition Phase
Persona sketches: These visualize user personas and help to understand their needs, goals and pain points.
User flow diagrams: Map out the user journey of the product—for example, a flowchart will depict the steps a user takes to complete a task, showing decision points and possible paths.
Ideation Phase
Storyboards: These types of sketches can effectively portray the narrative element of a design, whether it’s for a particular interaction or the entire user journey.
Low-fidelity wireframes: Outline the basic structure and layout of an interface, showing the placement of important elements like headers, navigation etc.
Prototyping Phase
UI Elements: Illustrate the individual components of a User Interface (UI) in detail. Sketch buttons, icons, menus and more.
Mid-Fidelity Wireframes: Refine a layout of a design, including more details like text, images and buttons.
Testing and Iteration Phase
Paper prototypes: While still rudimentary, these can create basic representations of interactive elements and screen transitions for user testing.
High-fidelity wireframes: Detail a final design that closely resembles the product before moving on to digital tools or development.
Add Value and Enhance Clarity: Annotate and Document Sketches
Annotations on sketches—essentially sketches with notes or vice versa, also referred to as sketchnotes or sketchnoting—explain and clarify design decisions and thought processes. Annotations transform raw sketches into a comprehensive narrative, facilitating better communication and collaboration. When a designer annotates their sketches, it becomes more informative and the reader will gain a deeper understanding of the designer’s approach.
In the next video, Mike Rohde explains what sketchnotes are.
ShowHide
video transcript
00:00:00 --> 00:00:33
What are sketch notes? Some of you may know what these things are. Some may not. I think of them, I call them “Notes Plus” sometimes because it's It's not like you stop writing notes. What you're doing is you're adding to your writing with lettering. So that might be your first step, is to do lettering. The next step could be drawing, and then you're focusing on the big ideas. That was the big understanding and realization for me as I began this work was because I was doing the analysis as I was listening,
00:00:33 --> 00:01:00
as I was writing, as I was drawing, as I was doing lettering, that I started to really make sense of things in the moment. And then all I was doing is capturing what was entering my mind. And the beauty of that was, back in the old way I took notes, I would write all these notes and then I didn't want to look through them anymore. So the benefit of this was, by doing it all in the moment when you're done with the session you're in or the the whatever time you're spending, your notes are ready to go, and then you can, of course, modify them.
00:01:00 --> 00:01:32
But the bulk of the work is done in the moment and you don't have to go back and like parse out what's valuable and what is not. So that's a really important thing to think about. People will say “I've been doing that for years, I never knew what the name was”. So having a name sometimes can be valuable, but really it's this idea of expanding beyond just writing words to adding visuals, whether that's lettering, which is a visualization of letter forms, or if that's drawing the things that are entering your head, drawing things from the PowerPoint deck that maybe someone's presenting, or if it's in a case of an experience or,
00:01:32 --> 00:02:00
you know, ideation, what are the things that are entering your mind that you can then put on the page or on the screen to help you remember that concept. So you might ask, “Well, why should I bother with this extra step of sketch noting?” Well, in my in my experience, I remember a lot more of the of the things that I experience when I sketch note them, whether that's a talk at a conference or if that's an experience of a meal
00:02:00 --> 00:02:32
or traveling or any other experience that I decide to visualize. There's something that's going on in our brains where the hearing and the writing and the drawing cements that idea. And I can look at sketch notes from years and years ago and still remember a lot of details around that moment when I took those notes. So that's a benefit. I think it helps you retain more. So if you take this approach because it's such a high, high detail moment where your brain is processing all this information and you're using your whole body, I believe that there's retention happening
00:02:32 --> 00:03:01
that makes what you remember last longer. So you can call it back into memory in the future when you need it. And of course, the last part is you can have fun doing it like this, that the whole thing that convinced me to continue doing sketch notes way back in 2006 was this idea that, “Hey, this is really fun. I'm enjoying taking notes”. I'm when the talk is done, I don't have to do any more work. And it's short enough and brief enough because you're, you know, looking for the big ideas.
00:03:01 --> 00:03:32
That's maybe four or five pages. It's shareable. You can now share. Not only is it good for you, but if you wish, it can be useful for someone else. And I found that true as well. So there is the fun aspect that should not be overlooked in sketch noting, I think it's really important, the things that you have fun doing, you repeatedly do, right? That's sort of the way we work as humans. So I thought it would be helpful to show some samples. But first, my big statement is: ideas, not art. So this is for those of you who feel like if I asked the question who feels like
00:03:32 --> 00:04:01
they can't draw and you're the person raising your hand, this is for you. “Ideas,not art” is all about this concept of forget about any drawing classes you took in college or any of those kind of things. We're talking about capturing ideas simply, and if you can use simple shapes to do that, it makes it possible for anyone to do sketch, noting it really lowers the bar and it reduces the pressure for people who feel like I can't draw, I don't know how to draw. I don't know where to begin. So first of all, I'm going to just show you some samples
00:04:01 --> 00:04:30
to give you a taste of how I've used this in my professional and personal life. So you can see these are these are sketch notes from meetings. These can be meetings or conferences. These are the one on the top left is an online conference that I attended. I did that with my iPad Pro. The one on the right is with some friends talking about graphic recording which is related to sketch noting. And finally lower right is a section that I attended about Agile learning about Agile and how, you know, Agile works so that I could apply it in my design profession.
00:04:30 --> 00:05:01
So this really helped me understand and have a little fun with those notes. You can see that's an example of what meetings might look like. So another way that might apply, especially to the designers, is this idea of sketch noting your ideation. So when you build these skills, you now feel like you have another power to go on a whiteboard, to go on a piece of paper, to use an iPad pro and a pencil to sketch out the ideas that are in your head so you can get them out, so you can look at them yourself, and then you can share them with your teammates to kind of work through like, is this a good idea or not?
00:05:01 --> 00:05:31
Right? A lot of times we have these discussions where we think we're agreeing when we're talking in words, but we really don't agree. It's this illusion of agreement. So by visualizing, it helps everyone get clear about what it is the idea is, so you can see on the left are these crazy ideas I had for hiding Thin Mints, the Girl Scout cookies, from my kids on the right was an idea, of course, that I took where I explored a storyboard. And then in the bottom right was when I first got a new computer exploring
00:05:31 --> 00:05:39
if I'm using usb-c cables, which cables would I need? Right? So it can be very practical ways to visualize ideas that you have.
Documentation, on the other hand, serves as a detailed record of the design process, including user research findings, design iterations, usability testing results, and final design specifications. This comprehensive approach ensures that every phase of the design process is transparent and traceable. Effective documentation supports the rationale for design choices, making it easier to revisit and refine designs as needed. It also provides a valuable reference for future projects and helps maintain consistency and quality in design work. Meticulous annotation and documentation are a sure-fire way to demonstrate a designer’s professionalism, thoroughness, credibility and creativity—ultimately enhancing the effectiveness of their design portfolio.
How to Use Sketches to Elevate a Design Portfolio
“It’s not the destination, it’s the journey”
—Ralph Waldo Emerson. American Philosopher
As the well-known saying goes, it’s not just about the final solution, it’s about the design journey. Hiring managers, recruiters, clients and anyone who may look at a UX design portfolio wants to see a designer's thought process and creative problem-solving skills—not just the finished product. Sketches are one of the most effective means of communicating ideas, methods and skills—they provide a visual narrative that showcases how ideas evolve from initial concepts to refined solutions. A successful portfolio should highlight a designer's ability to iterate, improve based on feedback and reveal the journey of design decisions—sketches offer a transparent view into the reasoning behind each choice. This not only differentiates the designer from others by showcasing a clear, hands-on approach but also engages potential employers or clients by illustrating the depth and thoroughness of the design process.
Case studies are an integral part of a UX design portfolio—including sketches is necessary to successfully illustrate the steps taken in each design project. They mustn’t be added simply for the sake of it, sketches must communicate a designer’s thought process, the progression of ideas and the iterative steps taken to refine designs. The more detailed the better—a high level of detail will showcase the designer's skills and also build credibility and trust with potential employers or clients.
What’s more, sketches add an element of authenticity and relatability to a portfolio. They humanize the designer, making the design process more approachable and understandable. A portfolio enriched with sketches effectively tells a compelling story, which makes the designer's work more memorable and impactful.
How can I improve my sketching skills for UI/UX design?
To improve your sketching skills for UI/UX design, practice regularly and focus on the fundamentals of drawing, such as lines, shapes, and shading. Study design principles and analyze existing designs to understand what makes them effective. Use tools like sketchbooks and pens to practice your hand-drawing skills, and digital tools.
Learn more about how to improve your sketching skills in our Master Classes with Mike Rohde:
Hey, fellow designers – want to make your portfolio stand out in this competitive industry? Join me in my upcoming master class, How to Elevate Your Portfolio: Sketching Your design Process. Your design portfolio isn't just a showcase of your work. It's also a story of your expertise and your creativity. And I'm here to help you tell a story in a way that captivates your audience. We'll use the power of sketches to illustrate your Design thinking process and make your portfolio stand out.
00:00:30 --> 00:00:42
Your portfolio isn't just about what you've designed. It's about how you think through problems to get to solutions. Let's elevate your design portfolio together. Join me in my master class!
Hey there, my name is Mike Rohde and I would love to teach you visual thinking and sketchnoting. Join my master class webinar and learn why it's important to sketch; the value of going paper before you go to pixels. Learn the 5 basic shapes so you can draw simply. And finally, an opportunity to practice with me live as I work through and exercise with you. So, join me and start your visual thinking practice today.
What are some essential tools for digital sketching?
Essential tools for digital sketching include:
Graphic tablets (e.g., Wacom, Huion).
Stylus pens (e.g., Apple Pencil, Surface Pen).
Design software (e.g., Sketch, Figma).
Prototyping tools (e.g., InVision, Marvel).
Learn more about sketching in our Master Classes with Mike Rohde:
How do sketches contribute to the ideation phase of design?
Sketches contribute to the ideation phase by allowing designers to quickly visualize and iterate on ideas. They help in brainstorming sessions, facilitate communication among team members, and provide a tangible way to explore different design concepts before committing to detailed prototypes.
What are some well-regarded books on sketching for UX design?
Buxton, B. (2010). Sketching User Experiences: Getting the Design Right and the Right Design. Morgan Kaufmann.
Garrett, J. J. (2010). The Elements of User Experience: User-Centered Design for the Web and Beyond. New Riders.
What are the best practices for creating effective wireframes?
Best practices for creating effective wireframes include:
Start with low-fidelity sketches to focus on layout and structure.
Use consistent design elements like grids and UI components.
Label each element clearly to convey functionality.
Keep it simple to ensure focus on the basic structure.
Iterate and refine based on feedback.
Learn more about wireframes in this video:
ShowHide
video transcript
00:00:00 --> 00:00:30
Wireframing is like creating a blueprint for a website or app. Imagine you want to build a house before the builders start. An architect draws a simple sketch showing where the rooms will be, where the doors and windows go, and how everything connects in the same way when making a website or app. Wireframing is the first step. It's a basic, no frills outline of how the pages will screens will look. It helps designers and developers plan with things will be placed like buttons, images and text. It's not about the colors or fancy details.
00:00:30 --> 00:01:00
It's more about the structure and layout, like arranging the rooms in a house. Wireframes help make sure everything fits together well before the actual building or coding begins. Creating a wireframe during a UX project involves several steps. Understand goals, know the project goals, and user needs. Sketch ideas roughly sketch layouts on paper or digitally create low fidelity wireframes. Use a tool to make simple grayscale wireframes showing basic structure and placement.
00:01:00 --> 00:01:29
Get feedback, share wireframes. Gather feedback and make adjustments. Refine and iterate. Make improvements based on feedback. Focusing on functionality. Create high fidelity wireframes and colors. Fonts and images for a more detailed look. Test and validate. Conduct usability testing and refine further. Finally, ease and hand off complete high fidelity wireframes and handoff to the design and development teams. Wireframing helps to plan and visualize a user friendly design before diving into the details.
How do I transition from sketches to digital prototypes?
Transition from sketches to digital prototypes by first digitizing your sketches. Use your sketches as a guide to create wireframes, and then add interactivity and detailed design elements. Collaborate with your team to refine the prototypes and test them with users to gather feedback.
Learn more about sketching in our Master Classes with Mike Rohde:
How detailed should sketches be in the initial stages of design?
In the initial stages, sketches should be low-fidelity and focus on the overall layout and structure rather than details. Aim to capture the main ideas and flow of the design, leaving specifics like color and typography for later stages.
“Your portfolio is your best advocate in showing your work, your skills and your personality. It also shows not only the final outcomes but the process you took to get there and how you aligned your design decisions with the business and user needs.”
— Morgane Peng, Design Director, Societe Generale CIB
In many industries, your education, certifications and previous job roles help you get a foot in the door in the hiring process. However, in the design world, this is often not the case. Potential employers and clients want to see evidence of your skills and work and assess if they fit the job or design project in question. This is where portfolios come in.
Your portfolio is your first impression, your foot in the door—it must engage your audience and stand out against the hundreds of others they might be reviewing. Join us as we equip you with the skills and knowledge to create a portfolio that takes you one step closer to your dream career.
The Build a Standout UX/UI Portfolio: Land Your Dream Job courseis taught by Morgane Peng, a designer, speaker, mentor and writer who serves as Director of Experience Design at Societe Generale CIB. With over 12 years of experience in management roles, she has reviewed thousands of design portfolios and conducted hundreds of interviews with designers. She has collated her extensive real-world knowledge into this course to teach you how to build a compelling portfolio that hiring managers will want to explore.
In lesson 1, you’ll learn the importance of portfolios and which type of portfolio you should create based on your career stage and background. You’ll discover the most significant mistakes designers make in their portfolios, the importance of content over aesthetics and why today is the best day to start documenting your design processes. This knowledge will serve as your foundation as you build your portfolio.
In lesson 2, you’ll grasp the importance of hooks in your portfolio, how to write them, and the best practices based on your career stage and target audience. You’ll learn how and why to balance your professional and personal biographies in your about me section, how to talk about your life before design and how to use tools and resources in conjunction with your creativity to create a unique and distinctive portfolio.
In lesson 3, you’ll dive into case studies—the backbone of your portfolio. You’ll learn how to plan your case studies for success and hook your reader in to learn more about your design research, sketches, prototypes and outcomes. An attractive and attention-grabbing portfolio is nothing without solid and engaging case studies that effectively communicate who you are as a designer and why employers and clients should hire you.
In lesson 4, you’ll understand the industry expectations for your portfolio and how to apply the finishing touches that illustrate your attention to detail. You’ll explore how visual design, menus and structure, landing pages, visualizations and interactive elements make your portfolio accessible, engaging and compelling. Finally, you’ll learn the tips and best practices to follow when you convert your portfolio into a presentation for interviews and pitches.
Throughout the course, you'll get practical tips to apply to your portfolio. In the "Build Your Portfolio" project, you'll create your portfolio strategy, write and test your hook, build a case study and prepare your portfolio presentation. You’ll be able to share your progress, tips and reflections with your coursemates, gain insights from the community and elevate each other’s portfolios.
All open-source articles on Sketches in UX/UI Design
Contextual Design is a structured, well-defined user-centered design process that provides methods to collect data about
Book chapter
Open Access—Link to us!
We believe in Open Access and the democratization of knowledge. Unfortunately, world-class educational materials such as this page are normally hidden behind paywalls or in expensive textbooks.